
Queen Mera Costume Tutorial #DIY
- Behind the Scenes
- Tutorials
- Posted by Anahita Tabarsi on October 23 2018
Share Tweet
It's almost Halloween - a beloved time of year for everyone in the studio, most of whom painstakingly handcraft their glorious Halloween costumes!
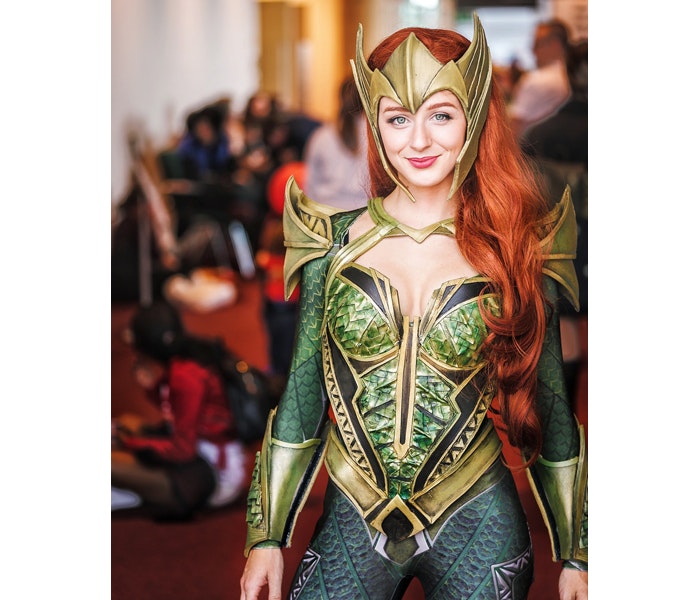
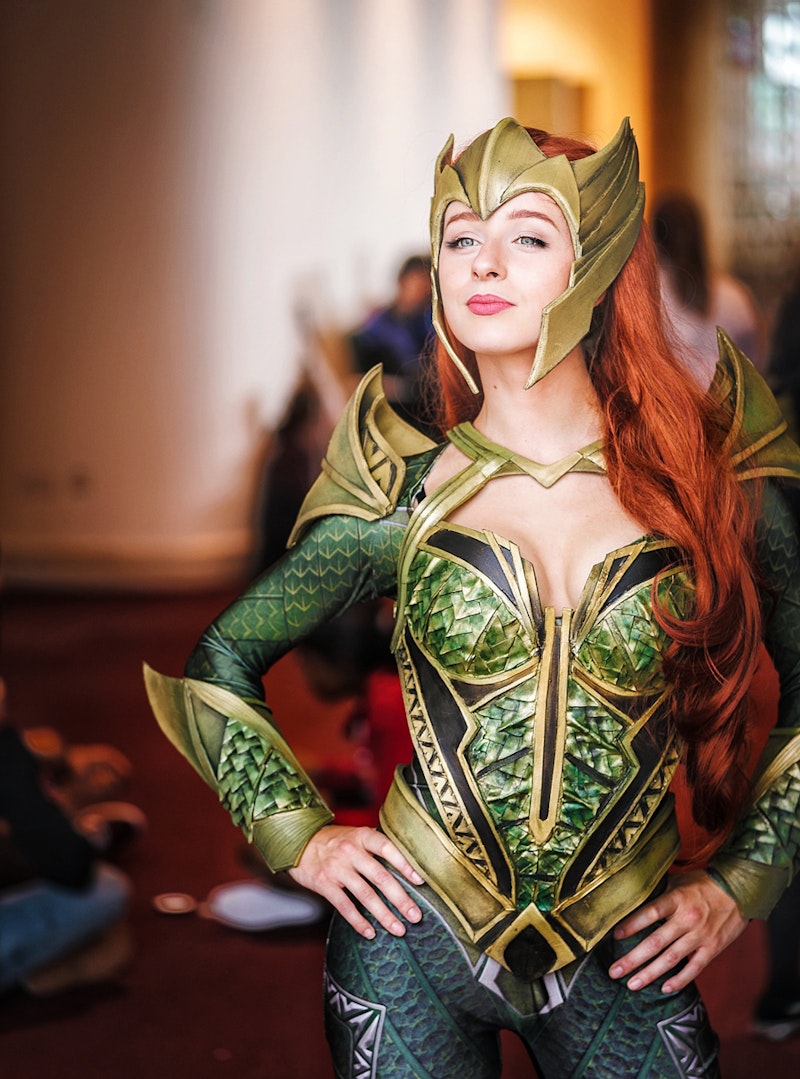
Today, we've got a treat for all you superhero fans out there - a DIY tutorial of Queen Mera's costume from Aquaman created by our very own cosplay wunderkind, 2D Designer Lynne Guthrie!
Check out the step by step process below and you too can make quite the splash this October!
YOU WILL NEED
- Parental supervision
- A bodysuit
- Ankle boots
- Clingfilm
- Masking/duct tape
- Markers (red and black)
- Scissors
- Box cutter
- Ruler
- Heat gun
- Glue gun
- Contact glue
- Sand paper/Dremel
- 2mm, 3mm and 5mm craft foam
- Primer spray
- Face mask (for H&S while spray painting)
- Gold spray paint
- Green spray paint
- Brown, black and green acrylic paint
- Paintbrush
- String
- Velcro strips
- Press fasteners
- Ability to rule a kingdom
STEP ONE - Bodysuit
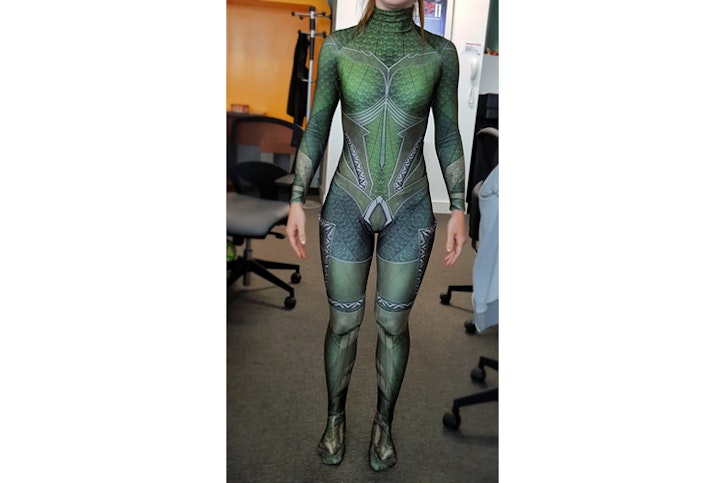
Lynne: First step to becoming a queen? Realise that the cold doesn’t bother you anyway… oh wait. The first step to becoming the Queen of Atlantis is ordering your body suit! This is a great base for mapping out where all the patterns for your armour will go as you can follow the pattern on the suit for each piece to fit your body perfectly. This one pictured below is the Custom Printed Queen Mera Zentai Costume.
STEP TWO – Pattern making
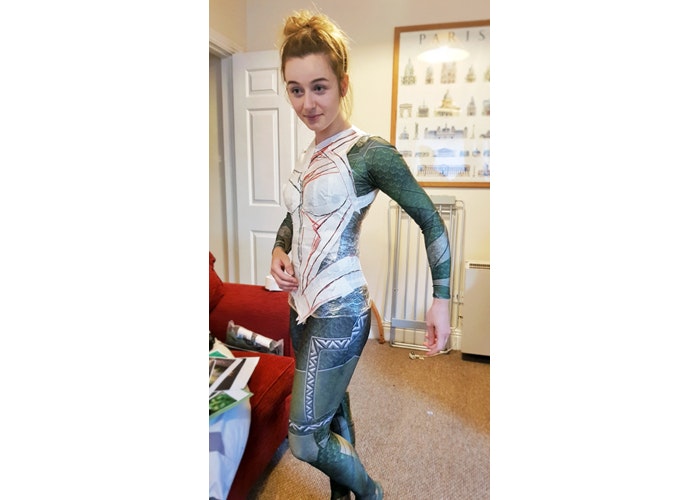
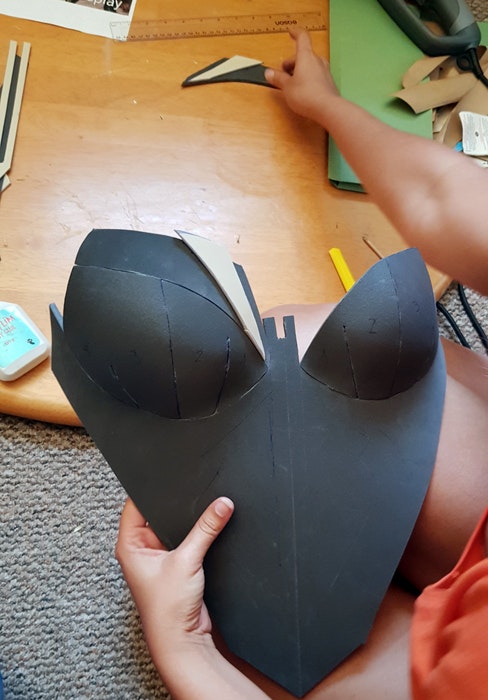
Lynne: Once you have your body suit you can begin the armour making process! My friends wrapped me in clingfilm all over (warning: being wrapped in clingfilm may cause excessive sweating…gross) and then began taping the shape of the breastplate with masking tape over the clingfilm in the shape of the pattern on the bodysuit (duct tape is a better option as it is sturdier and less likely to tear, also it is easier to cut and shape).
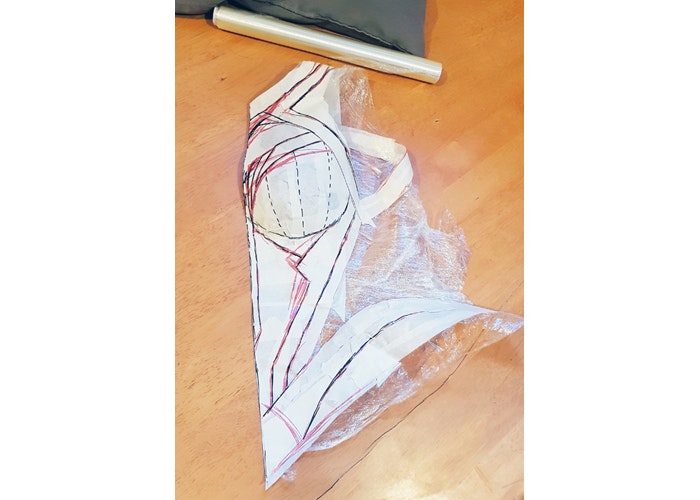
Once you have the basic shape, you need to use photo reference of the armour you are recreating and draw in the details using markers.
TIP: Begin with a red/pale marker to rough out the pattern and then once the shape is perfect, draw over the correct line with a black marker.
Try and use symmetry as much as possible where you can as it means the end result will be even. So for the breastplate, once the shape was drawn, we cut it down the middle in half and used only one side for making the patterns. Also, if a piece has a curved shape, you will need to make cuts within it so that the tape can lie flat on your foam later for cutting (see the dotted lines in the photo below).
Now, write on each piece what the area is and if it is right or left, this way when you cut it up you won’t look at 4 shapes that look the exact same and wonder why you have created the world’s hardest 3D puzzle!
So yeah, label your pieces, and then cut them up and lay them flat onto foam. If it is a base or thick piece, 5mm is a good thickness to use. For smaller details or if you are layering the foam, 2mm or 3mm is a good option.
STEP THREE – Foam cutting and gluing
Lynne: Lay your pattern pieces onto the foam and draw around them with a pen or marker ensuring they don’t budge, and then cut the piece out using a box cutter (kids/big kids ask for help from your parents).
Using the original pattern, flip it over and trace again, this will give you the opposite side of the body if you are using symmetry (eg. We used the left side of the breastplate, so the front facing piece was the left and when I flipped the piece over it became the base for the right side).
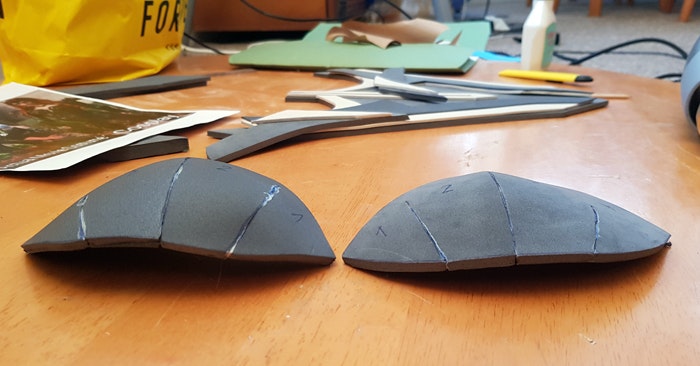
Here you can see the breast plates cut and glued together using contact glue. The one on the right was just glued together, then the one on the left shows the next process using a heat gun to shape it into a curve using a bowl. With contact glue you need to thinly coat both sides you are going to glue together, wait for it to become tacky and then push together.
WARNING: once it is stuck together, it WILL NOT come apart unless you tear the foam. So take this part slowly!
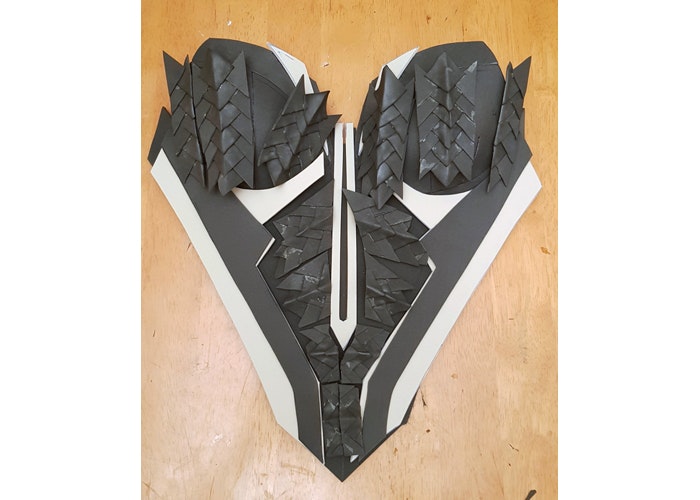
Then you begin cutting and gluing all the pieces together to get the base shapes, before moving onto finer details. For the scales cut 2mm foam into 3cm x 3cm squares, cutting half of them into triangles, gluing them into the scale pattern (2 triangle pieces on the sides with a square/diamond piece holding them together.

Then continue gluing this pattern upwards, heating them up and pinching down the middle and then gluing onto the breastplate after cutting to shape.
The scales for the breastplate alone took 7 hours…
STEP FOUR – Adding details
Lynne: Following the pattern on the body suit with constant referencing of the costume, cut out the remaining pieces of foam and glue them all together.
Attach neck straps and leave them open at the back for velcro at a later stage, add more triangular detailing down the side of the breastplate, and a belt that is also left open at the back for velcro.
Don’t forget the all-important Atlantean symbol which is featured on the front and back of the belt as well as the centre of the neck piece. Remember, the base pieces should be thicker (5mm) and the smaller the details, the thinner the foam (3mm, 2mm).
STEP FIVE – Crown
Lynne: Now onto the queen’s crown/tiara. Starting with thin paper wrap it around your head and make the basic shape you desire. Then refine the design by separating out the parts that will be different pieces of foam by cutting out each piece in paper and then loosely taping it together to see if it is working with the dimensions of your head.
Using coloured paper really helps to see more clearly the shapes against each other.
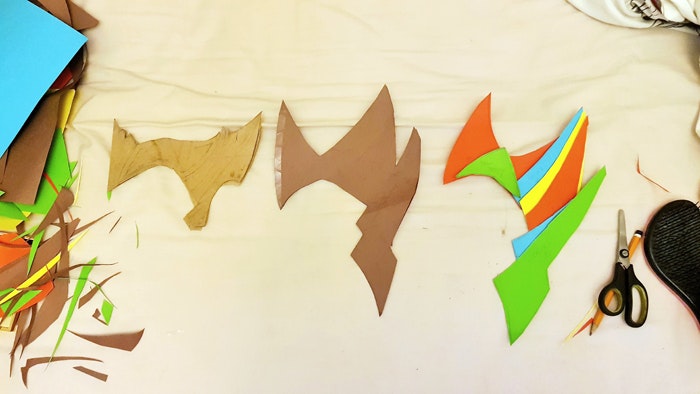
The base of the crown is 5mm to keep the rigidity and then on top of that glue on the pieces in both 2mm and 3mm. Make sure and leave enough foam to layer the next piece onto it, as this adds strength to the piece.
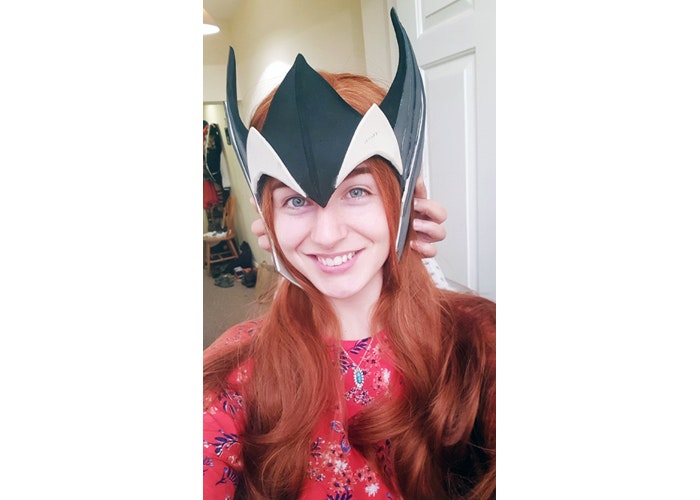
For the centre part use a heat gun and curve it back. To add comfort to the cheek pieces, sand down the inside with sandpaper and use a heat gun in order to make it ‘hug’ your jaw more.
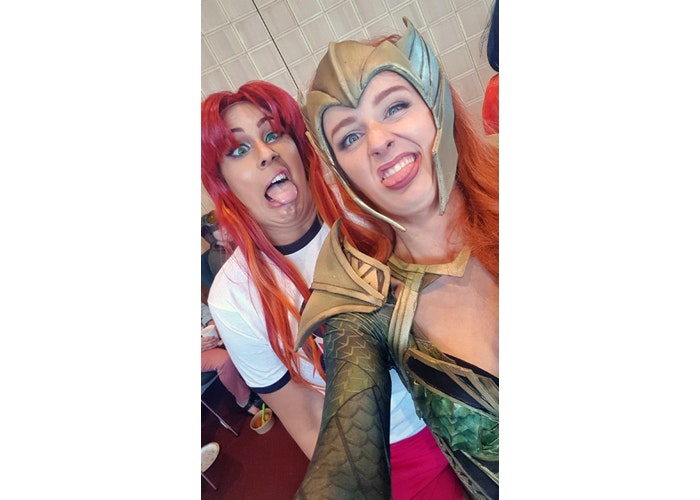
Using sandpaper curve the edges of the foam to give a more curved appearance. Also, here you can see a fabulous lush wig was necessary that even Ru Paul would be jealous of, as Mera is an awesome redhead.
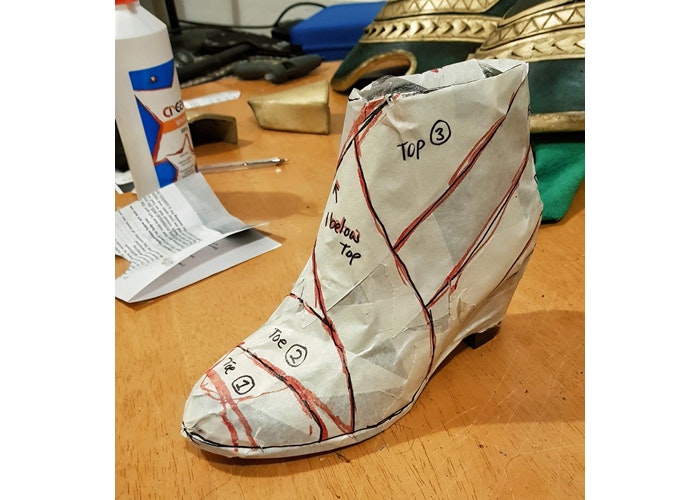
STEP SIX – Boots
Lynne: For the boots, I bought a cheap pair of ankle boots and covered them in clingfilm and masking tape. I then drew on the pattern with markers for how each piece of foam would layer over each other.
I find it helpful to take photos of the patterns before I cut them as even with everything labelled it still gets confusing once you’re looking at random shapes.
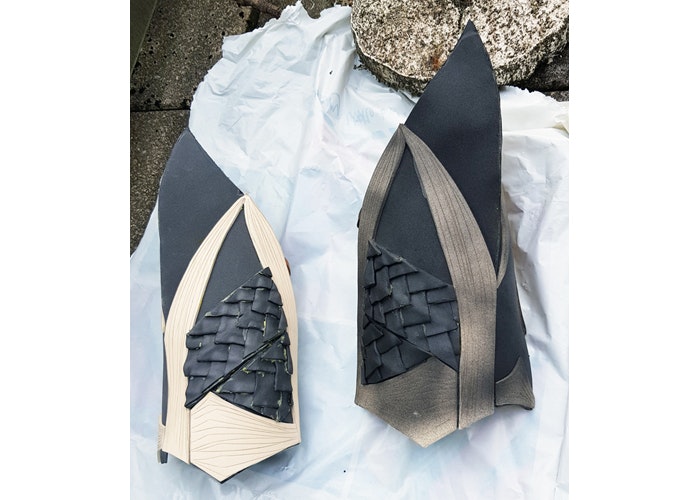
Then once the pieces of foam were cut (2mm), I extended two of them to reach the back of my calf as Mera’s boots have a leaf detail there that is attached to the boot (Side note: The boots I bought were faux suede and the contact glue stuck perfectly).
The calf pieces were made by cutting 3 curved diamond shapes and gluing one below the other (about an inch gap) creating a curved shaped that extends out from your calf.

STEP SEVEN – Bracers
Lynne: To make Mera’s bracers, create two leaf shape pieces that wrap around the forearm, with space for an extra piece that will extend out from the elbow. Also, make sure that you leave an extra inch of foam in a strip to velcro them around your arm later, as if you glue it all together, you will never get it over your hand!
Add foam borders to the pieces and then add scores using a scalpel to add the texture of the original costume. Then you’re favourite thing ever… making more scales!!! Add scales to the outer part in the pattern shown.
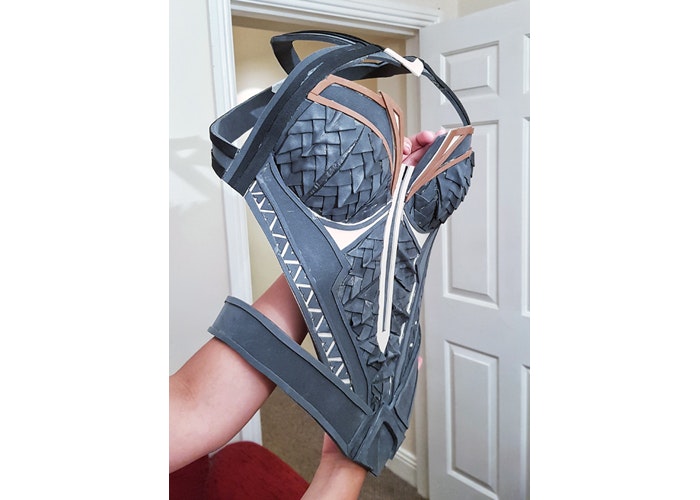
I didn’t take any photos of the making of the shoulder pieces in progress, but in this very beautiful photo you can see there are 3 separate pieces of foam that are glued together by thin squares of foam to allow for movement. The uppermost piece has the triangle pattern from the breastplate, and they all have a basic rim.
Also, to note that you may need to cut your bodysuit so that the chest is bare as the one I used made by zentaizone has a turtleneck, and Mera is not a turtleneck kind of gal.
Now all of your pieces are made, you are ready for priming, painting and adding fasteners!
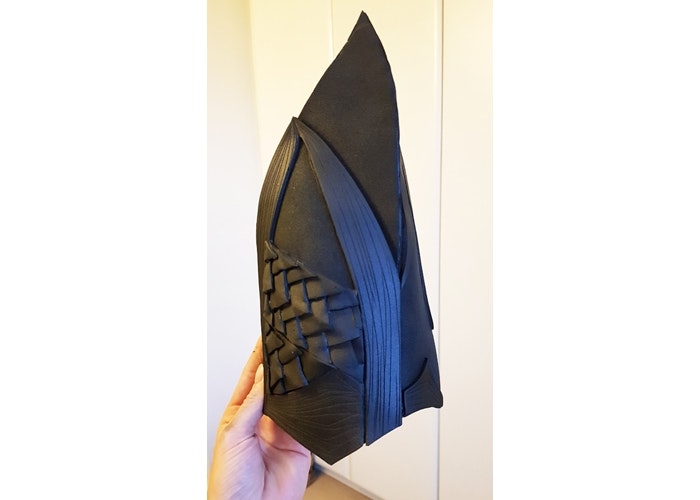
STEP EIGHT - Priming
Lynne: You will want to coat your pieces of foam thinly with 2 coats of primer, wait for the first layer to dry first and be patient with this part. This will make a smooth base for your painting layers, avoid any dulling of colour, and give more of a plastic as opposed to porous look of foam. I chose black but you can also buy other colour cans too.
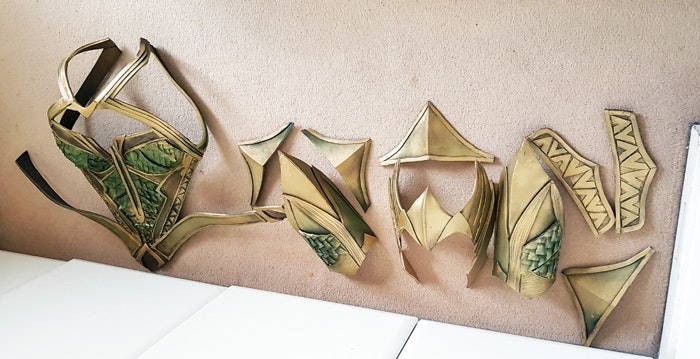
STEP NINE - Painting
Lynne: Once all your pieces are primed and dry, spray all of your pieces with a coat of gold paint. Wait for that to dry, then add another coat, wait for it to dry (yes it is as boring as watching paint dry…) spray some green detailing on the scales and bracers making sure to mask any gold pieces you want to keep sharp.
Make sure and do this step outside and preferably during then day and when it is not windy (I speak from frustrating experience…).

Then mix together a brown and black acrylic paint and paint this on with a small brush to ‘weather’ your armour. The best places for weathering are the cracks and along the foam edges, think of where dirt would build up.
Also paint in the darker areas of the breastplate with black.
TIP: For cosplay, contrast is your best friend. It may look very fake and too ‘comic book-y’ but in photos everything looks more muted, so don’t be afraid at this step to really make your armour pop with contrast.
The boots were the same process only no green is needed.

STEP TEN – Fastening
Lynne: The last step before you are ready to go out and show the seven seas who is boss, is making your amour attach to your bodysuit. Sew on press fasteners to the suit, and then glue the attaching side to the armour with a hot glue gun. Use this technique for attaching the belt, shoulders and calf pieces to the suit.
You can also use sticky velcro, however, it is less reliable. For securing the bracers together use a hot glue gun to glue two pieces of velcro along the extra piece of foam you added and wrap tightly around your forearm. Use hot glue and velcro for the back straps as well.
For the crown cut a piece of string to fit your head with the crown and use a hot glue gun to attach it above the ear on the inside of the crown on both sides.
And you are done! Now all that’s left to do is master hydrokenisis and you can rule Atlantis like the boss queen you are. I also had an Aquaman to rule by my side, so if you can pick yourself up one of these at the craft shop too, it’s a bonus.
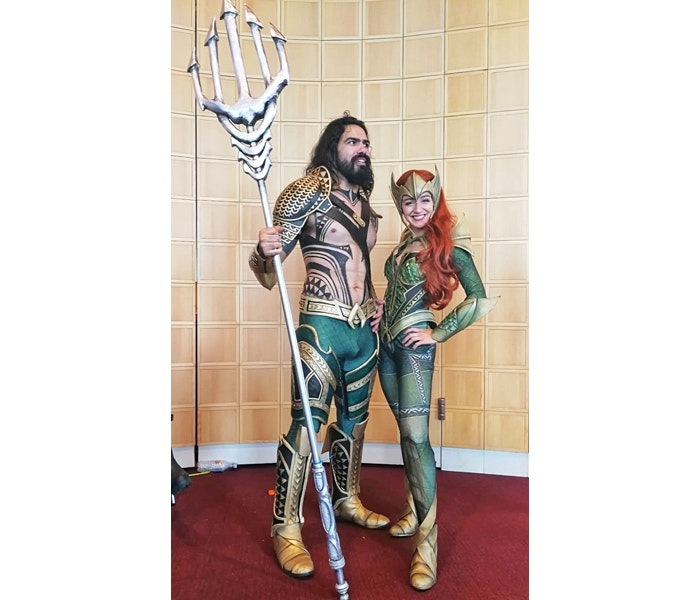
All of this armour couldn’t have been made without the amazing peachcosplaycraft and drogo.the.butcher, check out their cosplays, they will blow your shark socks off.
You can also see more of the making of Mera on my Mera Instagram Story at lynne.g.007.
For more #CostumeDIYs check out our 3D Majora Mask, Troll Mask and Scarring Make-up tutorials.
Happy Halloween!
Anahita Tabarsi
Anahita is Brown Bag Films' Marketing Director, Digital & Social and drinks more than five coffees a day...
We Love Animation®
Brown Bag Labs is an exciting online space, brought to you by Brown Bag Films. We share great content for families as well as behind the scenes fun and tutorials from the Brown Bag Films team.
Get our great newsletter!
Get our great newsletter!