
Creating a Detailed 3D Majora’s Mask #CostumeDIY #Tutorial
- Behind the Scenes
- Tutorials
- Posted by Stefanie Zaarur on October 19 2018
Share Tweet
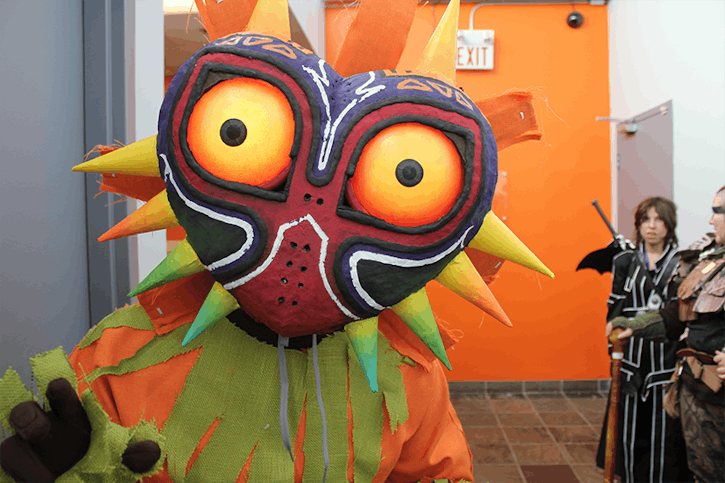
For all you Legend of Zelda fans out there (or for those who simply appreciate incredible creative craftsmanship), we have THE ULTIMATE Halloween costume for you!
Our super talented Animation Supervisor, Mitch Deslippe, created this Majora's Mask from scratch and we were lucky enough to get the step by step breakdown of his process.

STEP 1
Mitch: I printed out a template to determine the size, copied the outline onto parchment paper and stacked foam to the proper depth for the mask.
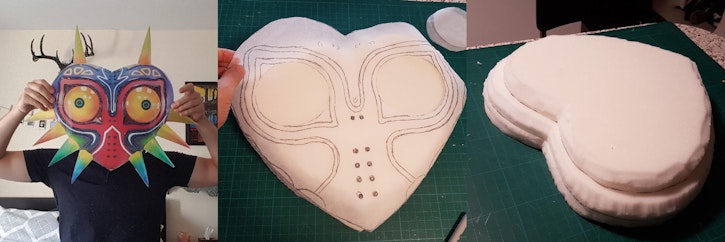
STEP 2
Mitch: I used push-lights as the eyes. Cut holes out of the top foam layer to contour the lights.
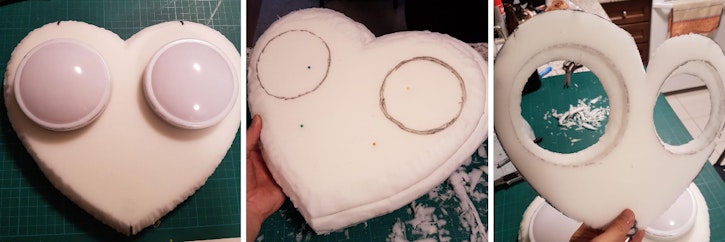
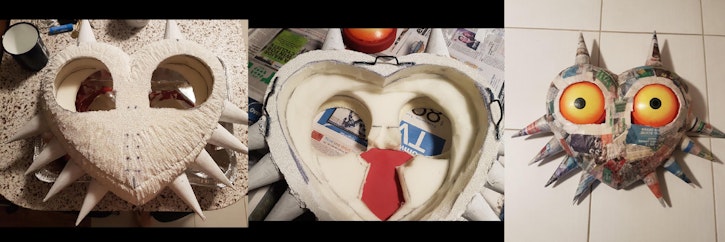
STEP 3
Mitch: I rounded the sides with scissors. Mixed paint with modge-podge to make a semi-transparent coating for the lights and filled cardboard cones with wooden beads so the mask would rattle when you shake it. Then I hot glued horns to the foam.

STEP 4
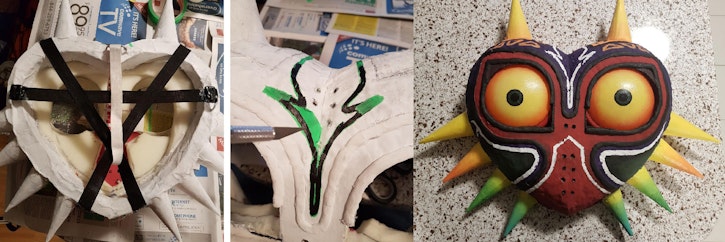
Mitch: I coated the mask with Gesso to seal/ hot glued the handles to the back of the mask for the support straps. Then I covered the mask with a layer of paper mache/newspaper.
STEP 5
Mitch: I used another layer of Gesso on the mask and added the details using Paper Clay. Then I used Gesso again over everything, to seal it all together.
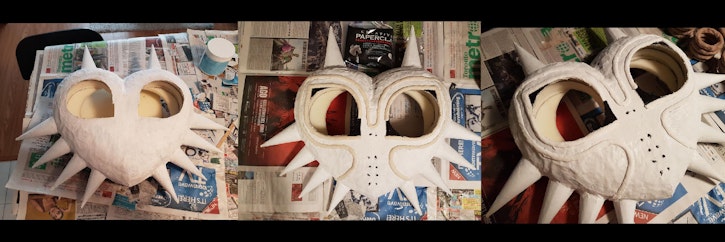
STEP 6
Mitch: Finally I added a whole bunch of elastic straps for heavy-duty support. I used painters tape for fine detailing and painted the mask with acrylic paint.
STEP 7
Show your hard work off!
For more #CostumeDIYs check out our Troll Mask and Scarring Make-up tutorials.
Happy Halloween!
Stefanie Zaarur
We Love Animation®
Brown Bag Labs is an exciting online space, brought to you by Brown Bag Films. We share great content for families as well as behind the scenes fun and tutorials from the Brown Bag Films team.
Get our great newsletter!
Get our great newsletter!