
Ragnar - Character Modelling and Texturing #Tutorial
- Behind the Scenes
- Tutorials
- Posted by Eoghan.Lynch on October 01 2019
Share Tweet
Looking to brush up on your modelling, texturing and lighting skills? We've got you covered with this #tutorial by Senior Character Artist Darko Mitev, who's based in our Dublin studio.
We caught up with Darko who walked us through the process on his latest character “Ragnar”!
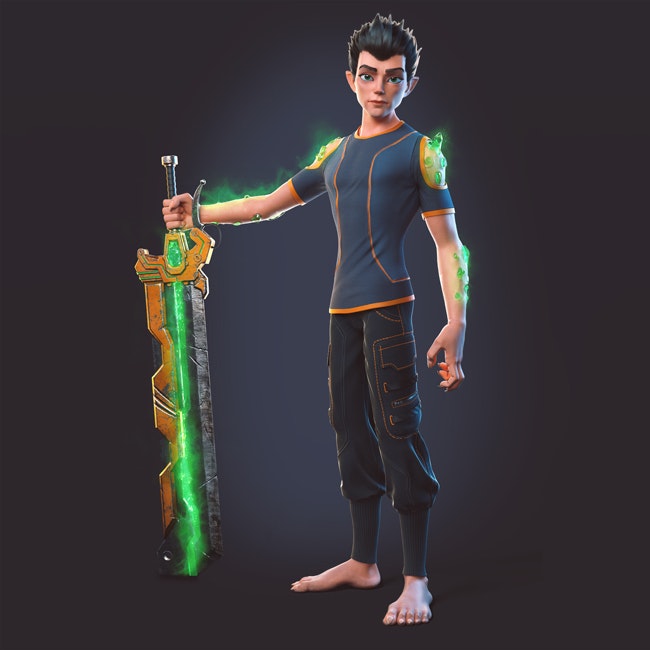
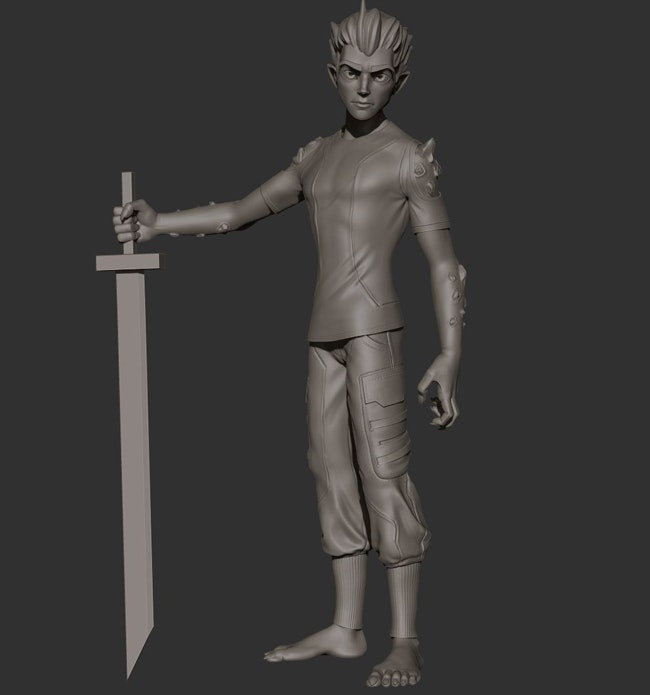
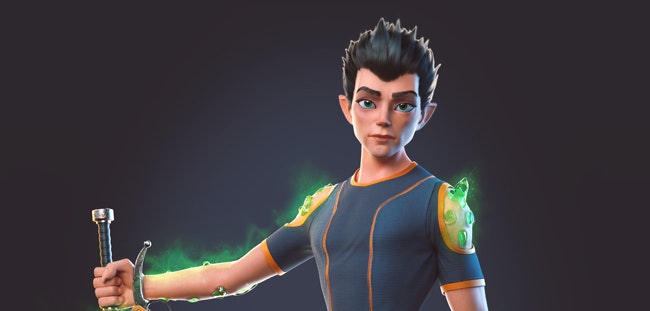
Darko: In this tutorial, we will look at the making of one of my latest images called Ragnar.
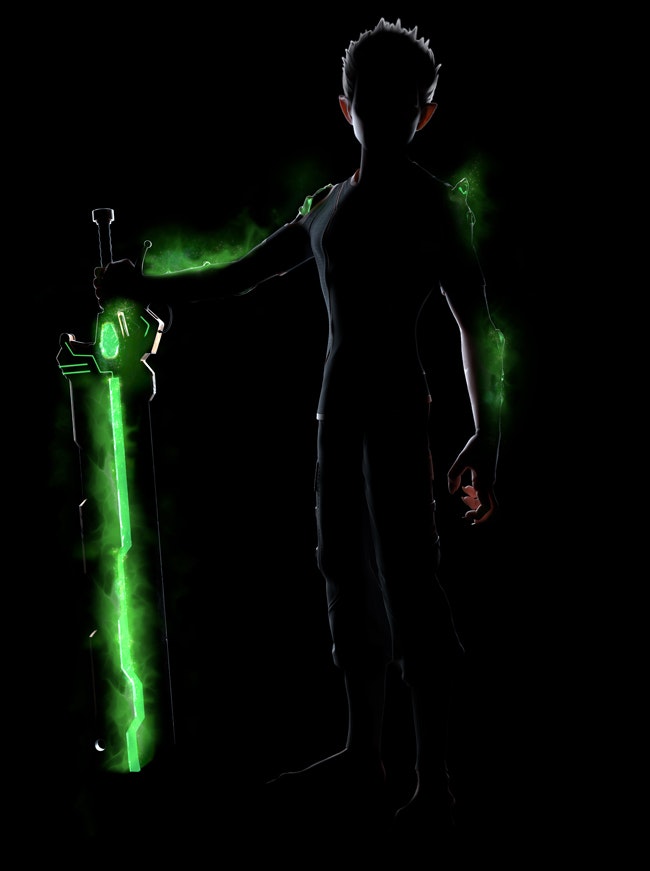
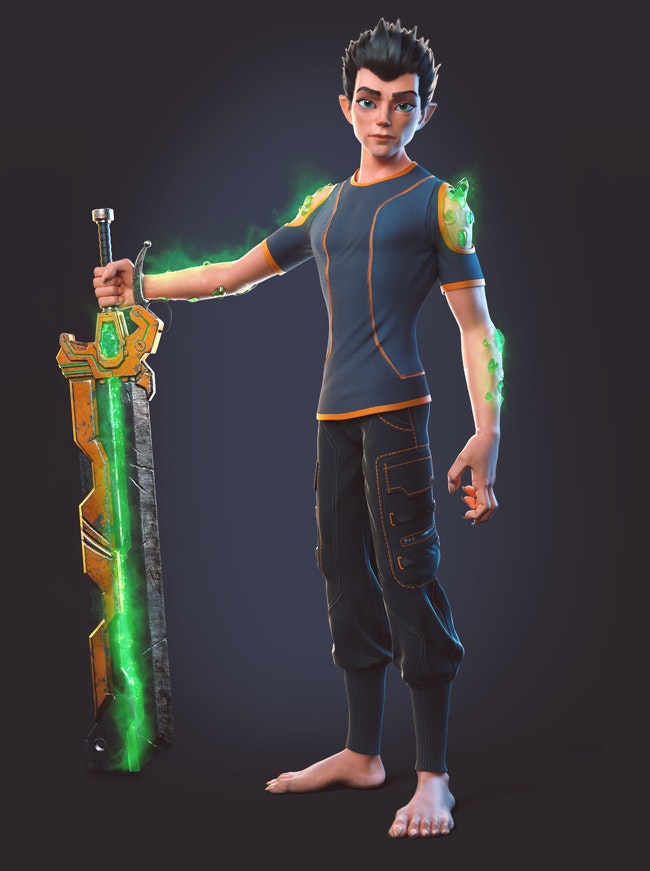
He is a superhero. He got his powers as part of genetic experimentation. Ragnar developed physical mutations on his body. The green crystal-like structure that grows on his body gives him great strength and stamina. His sword, specially designed for him by Chloe, serves as a catalyst for his power. When he uses it, he can transfer the energy into the sword to create a massive
He is not violent
So in this tutorial, we will cover basic concepts of design, sculpting, modeling, texturing and lighting, doing hair using
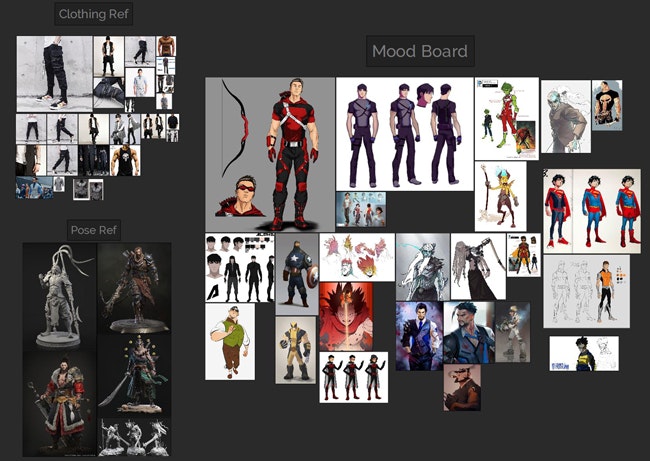
Step One: Inspiration and Mood Board
At the very beginning, I like to go do as much research as possible on the subject
After that, I usually
For this process, I like to use a software called PureRef. It is free, and a very powerful tool for reference collections.
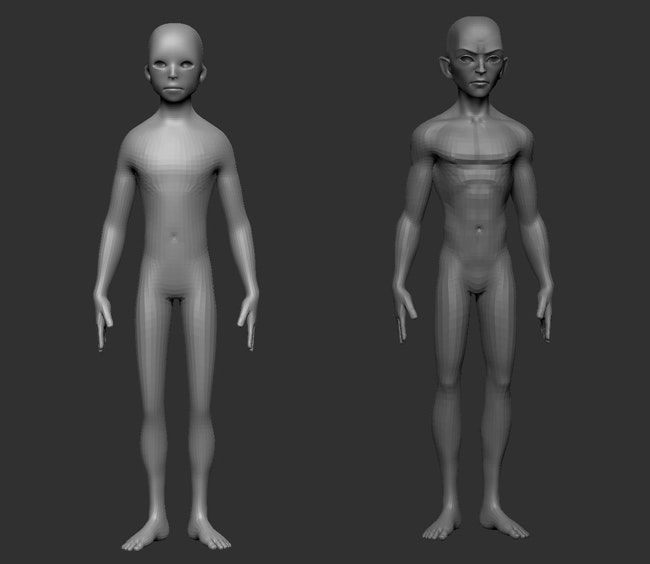
Step Two: Block Out
Because Ragnar was the last character in my superhero kids series, I already had a base mesh with good topology from one of the other characters called Max. I took the body of Max and deleted all the high res
At this stage, I am trying to find a basic silhouette, and I am not worried about secondary forms just yet.
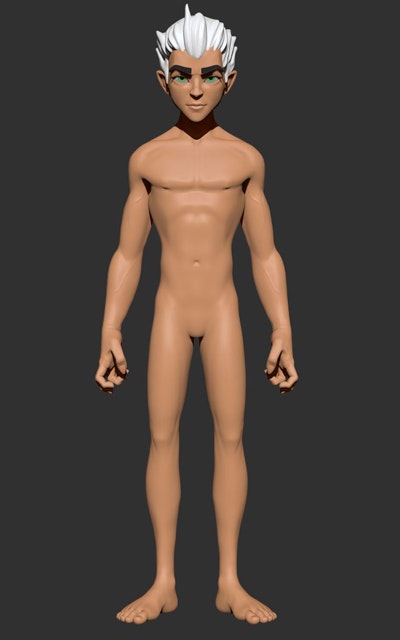
Step Three: Secondary Forms, Finding the Character
After the block out, I started to subdivide the base mesh to get more of the personality even in the neutral symmetrical pose.
I tried to sculpt as much of the character in the symmetrical pose before I posed it and break the symmetry because it is a great time saver. At this stage, I started to sketch the hair, decided that he
Step Four: Refinement, Clothing Design and Posing
Following the story
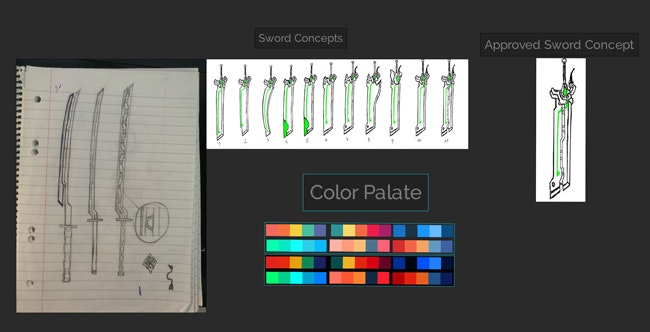
Step Five: Sword Concept
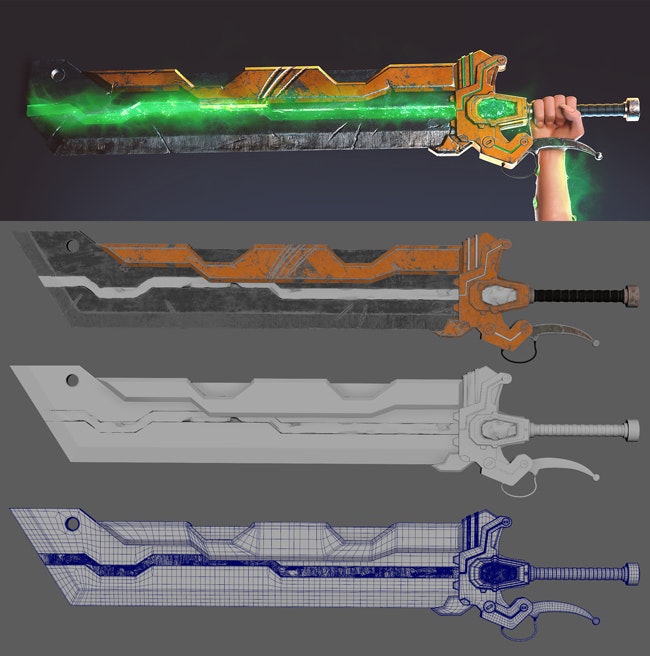
Step Six: Sword Modelling and Texturing
Modelling the sword in Maya was fairly straightforward. I imported my concept as an Image Plane and using box modelling I modelled the sword. After that, I did the UV’s and imported the sword in
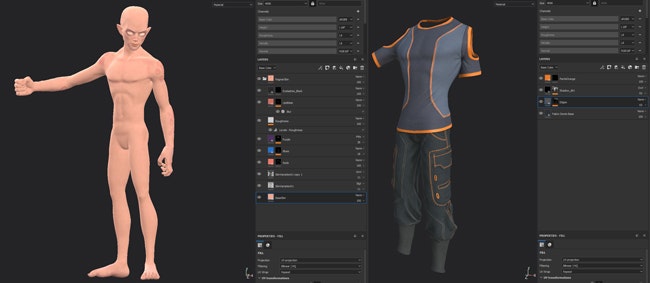
Step Seven: Texturing the Body and Clothing
The body and the clothing
These fill layers didn’t have any roughness, height or normal channels.
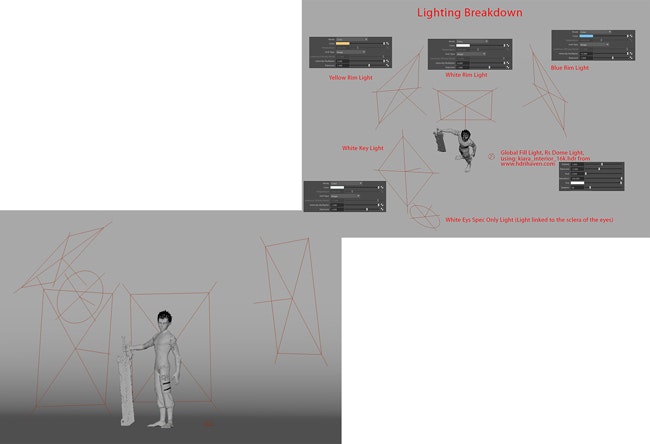
Step Eight: Lighting
I tried to keep the lighting as simple as possible, but also to have creative control over the final render. I used
6 lights. One Area Light serving as Key Light placed above the head, 3 Area Lights behind the character, with different colours and intensities serving as Rim Lights (to draw out the silhouette), one Dome Light with HDRI map to give some fill light in the shadows, and one Specular Only Light, light linked to the eyes for nice highlights.
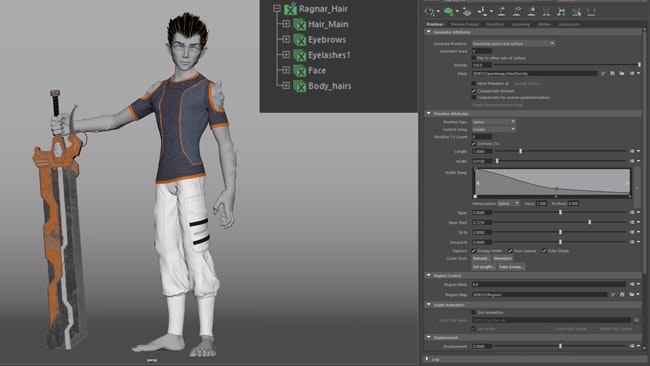
Step Nine: Hair Using
I then repeated the same step for the eyebrows, eyelashes and pitch fuzz for the body and the face.
In Conclusion
I learned a lot doing these character
I recommend this kind of study to everyone that is looking to improve their design and storytelling skills, and I hope you find this tutorial useful.
You can check out lots more of Darko's amazing characters at: www
Eoghan.Lynch
We Love Animation®
Brown Bag Labs is an exciting online space, brought to you by Brown Bag Films. We share great content for families as well as behind the scenes fun and tutorials from the Brown Bag Films team.
Get our great newsletter!
Get our great newsletter!