
The History Teacher - Breakdown #Tutorial
- Behind the Scenes
- Tutorials
- Posted by Anahita Tabarsi on July 17 2018
Share Tweet
Time for a tutorial! And, we've got a special little treat for you today…
Brown Bag Dublin Senior Character Modeler Darko Mitev takes us through a breakdown of his piece - The History Teacher - which was recently featured on 3dtotal!

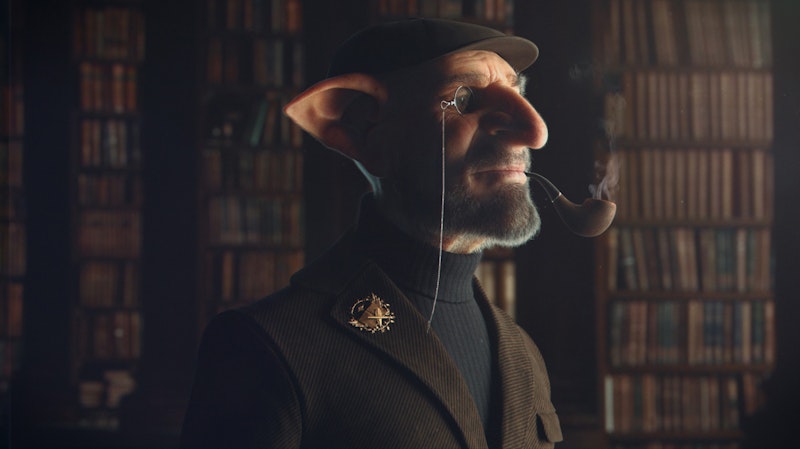
Darko: The idea for this project came after seeing the movie Fantastic Beasts and Where to Find Them. I was a huge fan of the Harry Potter franchise as a kid and the whole fantasy-magical world, so seeing the movie and the creatures they had created for it, brought me back to my childhood, and I was very inspired to do a piece in that vein.
Below is a step-by-step breakdown for my piece The History Teacher:
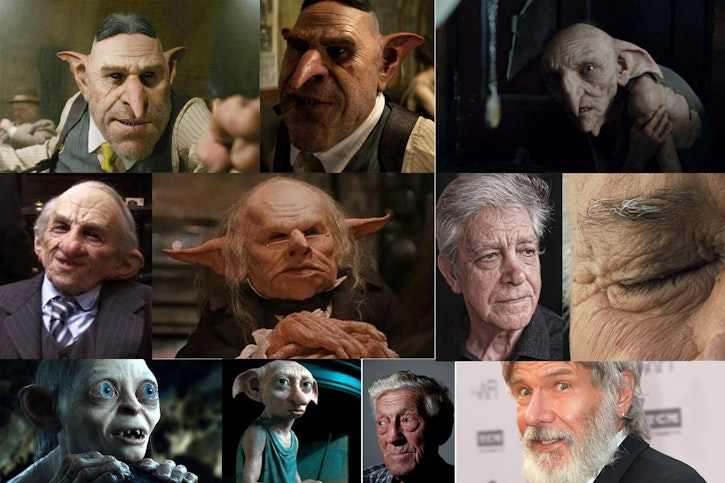
Step 1 - Collecting references:
So, right after seeing the movie Fantastic Beasts and Where to Find Them in the cinema, I went back home and started to search for references to try to figure out what I would like to create. I had a vague idea in my head but not clear enough to form a strong visual picture. So I created a mood-board to kickstart my design process.
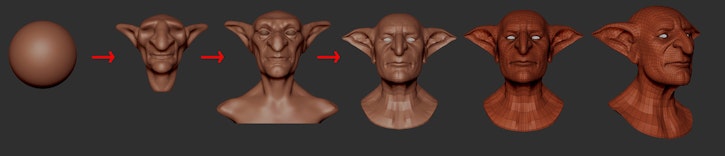
Step 2 - Concept Sculpt:
After that, I just started sculpting to see where the flow would take me. In the beginning, the shape of the head I was sculpting was very stylized, proportions very pushed, but I realized that to get the realistic look I wanted I needed to tone it down and go back to more realistic human proportions and shape for the head.
I started with Dynamesh and a simple sphere, and I blocked out the initial shape. Once I was happy with the base sculpt, I decimated the mesh and exported to Maya for retopology.
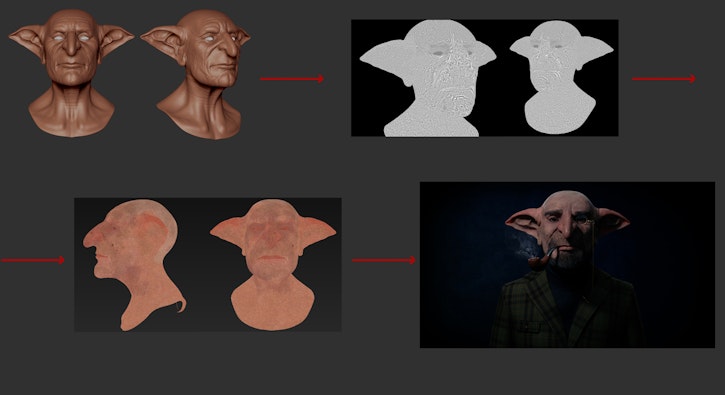
Step 3 - UV, Secondary Forms, Fine Displacement and Colour Map
After the retopoolgy I unwrapped the UVs in Maya and re-imported the mesh back into ZBrush. Then I re-projected the details from my original sculpt, and continued to work on the secondary forms.
When I was at a certain stage, I decided to do an experiment and try out Adobe Substance Painter as a tool for painting 32-bit displacement maps. So I brought the model into Painter, and started projecting displacement from https://texturing.xyz/. Then using the painted displacement, and hand-painting on top, I created a rough version of the colour map.
My approach is very iterative, and I like to jump from sculpting, to texturing, to rendering, and back to sculpting so I can judge how much detail is needed in the final render.
Step 4 - Unexpected set-back
So, the model was coming along nicely and I decided to model some clothing, add some props like the monocle and the pipe and started to block out the lighting and did test renders.
But after attending FMX 2017, I landed a job in Dublin, in Brown Bag Films! So, I had to leave home and move to Dublin, and basically start over. Five months passed before one day on Instagram Kris Costa (Antropus) published his amazing model: Portrait of Dick Smith, and it reminded me that I needed to go back and finish my old Goblin History Teacher!
Step 5 - Reworking:
So, after seeing Kris’s model, I pretty much opened the last version I had done, went to the lowest subdivision level, deleted the higher subdivisions.
I then took a skull from the default ZBrush project, extracted it and brought it into my scene. Once I placed the skull, I immediately realised the nose was too big, the eyes were too far apart, the overall skull shape was not working, and they all had to be fixed.
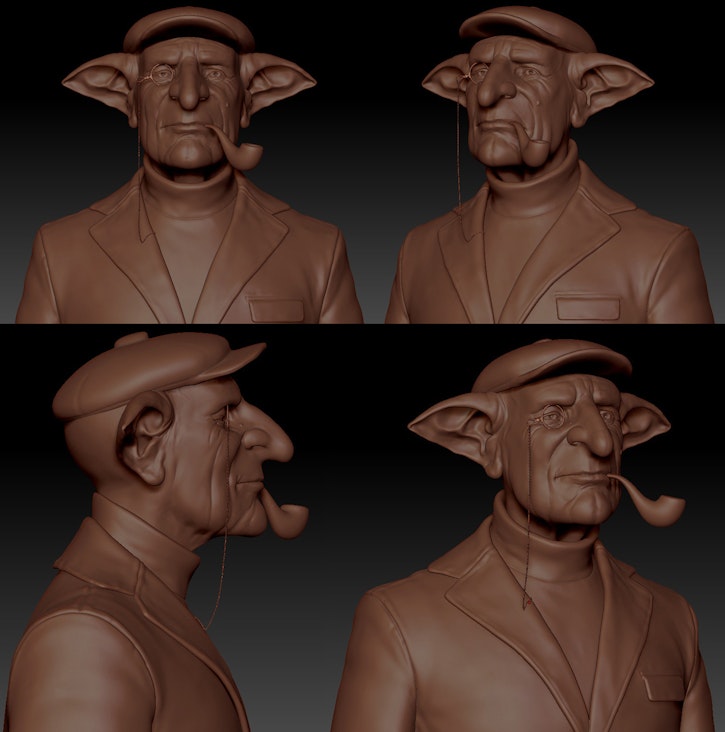
After the first adjusting pass, I decided to scale up the body and clothes to have more realistic human proportions and I also added the hat.
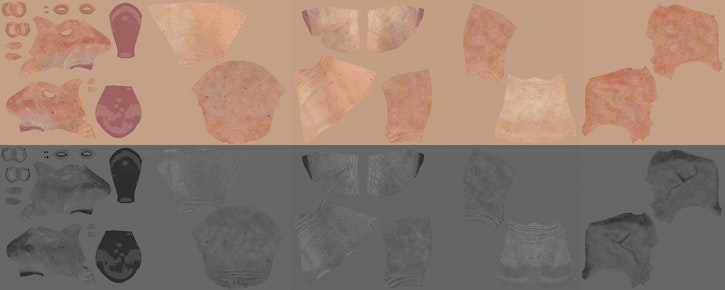
Step 6 - UDIM based UV’s, and Displacement Painting
Since I wanted to do close up renders I decided to utilize UDIM workflow. To get the resolution I like, I decided to go with 5 UDIM’s for the head, and use 8K textures per UDIM.
From there, I took the model to Mari for displacement painting. I painted the displacement maps in Mari, but because of the exaggerated forms of the model, some of the projections were a bit stretched or not aligned properly.

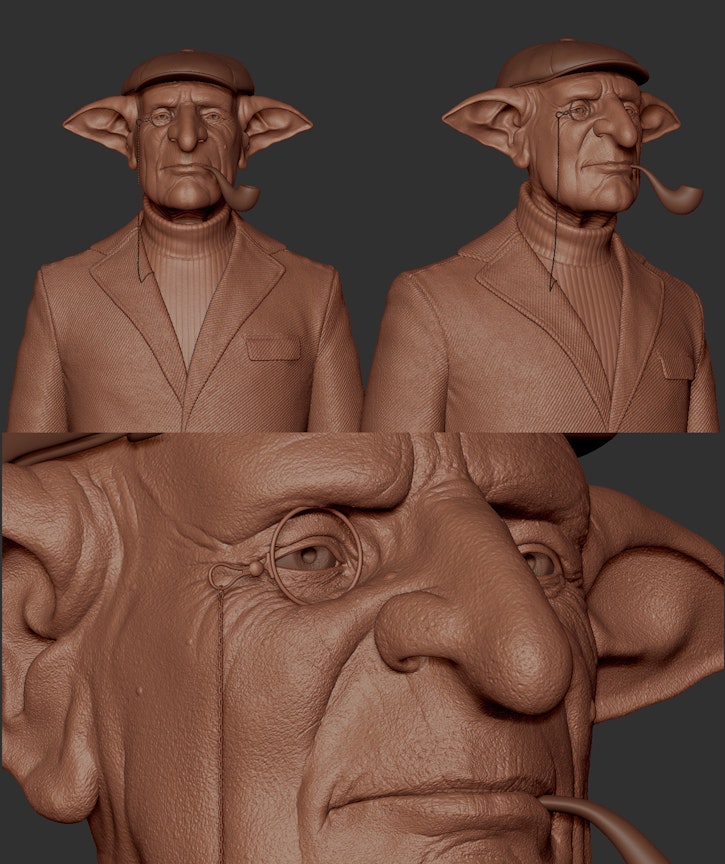
Step 7 - Final Sculpt and Details
After the displacement painting in Mari I took the model to ZBrush and used the XYZ alphas to project details on the stretched areas of the model, fix seams as well as add blemishes, veins and other details.
Step 8 - Texturing and Shading
For the texturing part, I switched gears to Autodesk Mudbox. I started with projecting polarized textures from XYZ textures collection, but because my model had a lot of custom details that give him character, I did a fair bit of hand-painting on top, to capture the skin tone that I wanted, and the details.
After that, I painted the roughness map as well as the SSS map also in Mudbox.
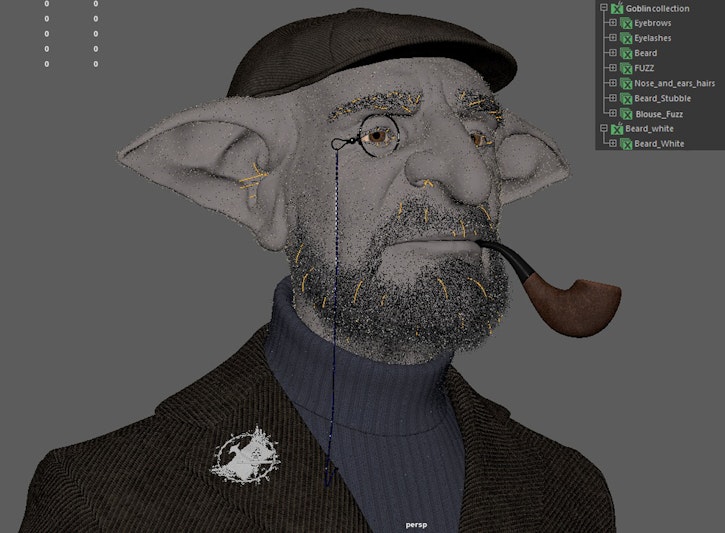
Step 9 - XGen
For hair and fur I used XGen. I broke down the various parts of the face to separate descriptions, and combined them under 2 collections.
In order to work properly, XGen requires Maya Project folder structure for your project, and it is very picky about it. To avoid a world of trouble, make sure to set up the project before starting to work with XGen. I used a combination of Groomable Splines and Guide Workflow for various parts of the model.
Step 10 - Lighting
I wanted to keep the technology simple. One good HDRI light, and one or two additional lights for specific purposes like Rim Light, or Fog Light.
I used a few different HDRI images from www.hdrihaven.com. All the HDRI images I use were 16K, and gave me incredible details in the lighting.
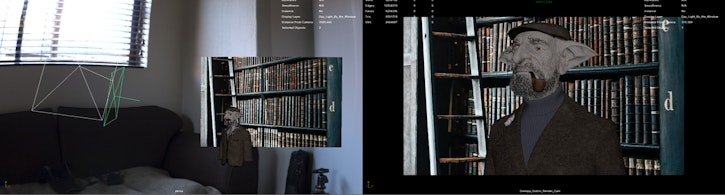
The image was rendered using Arnold 5, and to make sure that my textures and my model worked correctly and were production-ready, I tested it in a few different lighting scenarios with various camera angles, including extreme close-ups.
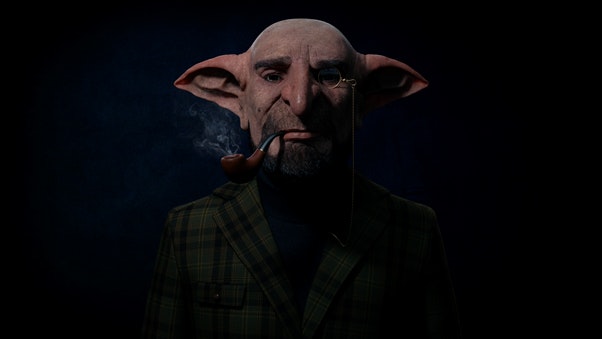
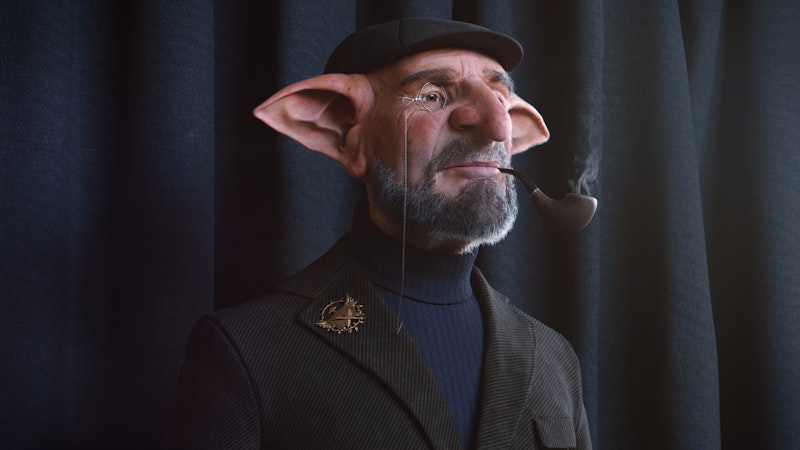
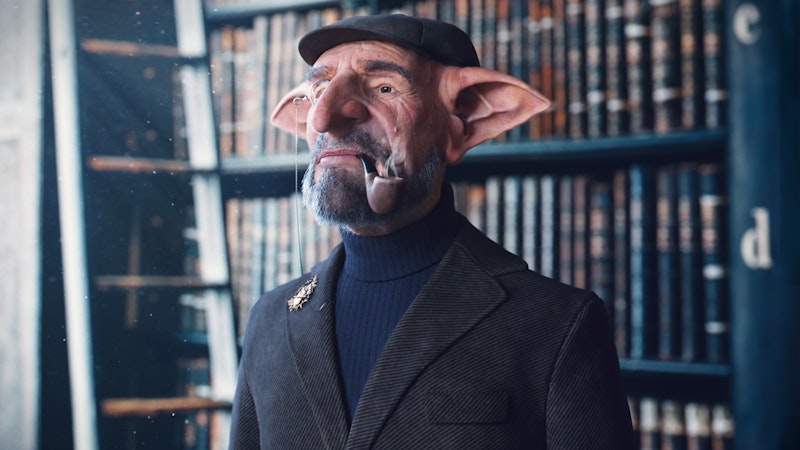
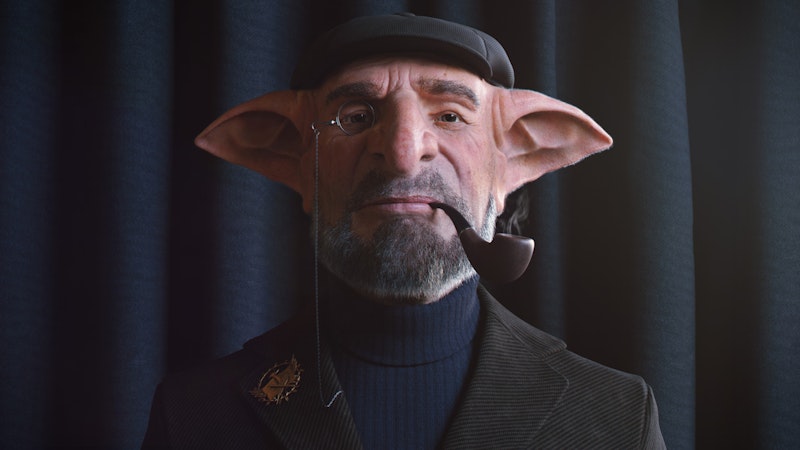
Here are some of the Final Renders:


Hope you enjoyed that! And if you've got any questions, feel free to pop them in the comments below.
Anahita Tabarsi
Anahita is Brown Bag Films' Marketing Director, Digital & Social and drinks more than five coffees a day...
We Love Animation®
Brown Bag Labs is an exciting online space, brought to you by Brown Bag Films. We share great content for families as well as behind the scenes fun and tutorials from the Brown Bag Films team.
Get our great newsletter!
Get our great newsletter!