
Dancing Hippo #Tutorial
- Behind the Scenes
- Watch Now
- Tutorials
- Posted by Magnus Kravik on November 25 2014
Share Tweet
Storyboard Revisionist Magnus Kravik goes through the steps involved in creating the rough animation of a dancing hippo in 2D.
Working this rough digitally is great because it’s so quick to make changes and adjust without worrying about details. In this instance I didn’t plan it out beforehand, other than a general idea of the movement. I just wanted to go with it and stay loose.
Here are some of the things that I tried to keep in mind as I was going through:
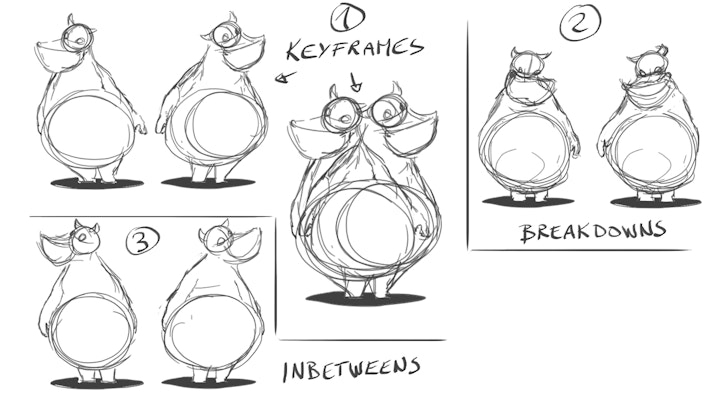
First I drew the two KEYFRAMES (1), so that I would know the beginning and end of my animation. Then I put down my BREAKDOWN (2), which in this case is a drawing straight in the middle. Generally, in the middle of a head turn it is good to rotate the head slightly up or down and tilt it to one side to avoid a robotic movement (it is also good to add a blink in there as the character shifts focus). Then I added one INBETWEEN on either side (3). I had the INBETWEENS favor the KEYFRAMES since this is where the movement will slow down and change direction (more drawings = slower movement).
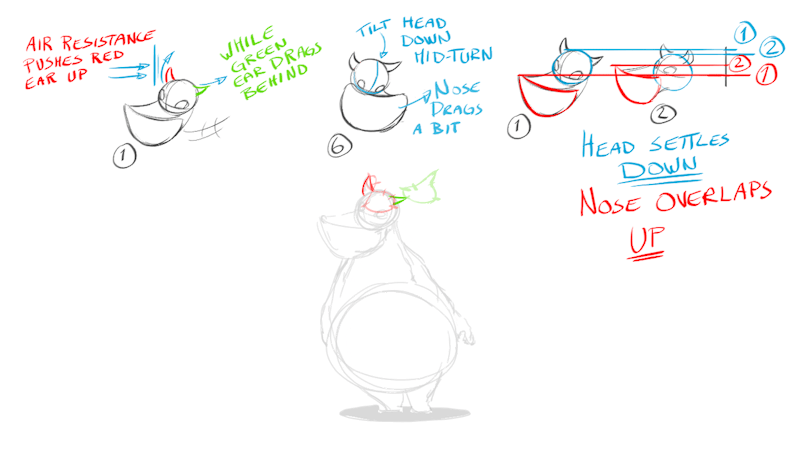
When drawing I keep in mind that the character is constantly moving. So one side is dragging behind (green side below), while the other is being pushed towards the body from the air resistance (red side below). In the INBETWEEN (drawing 6 below) the nose will also be dragging behind and will overlap the head movement as it comes to the KEYFRAME (drawing 1 below) and INBETWEEN (drawing 2 below).
Click the GIF below to animate!
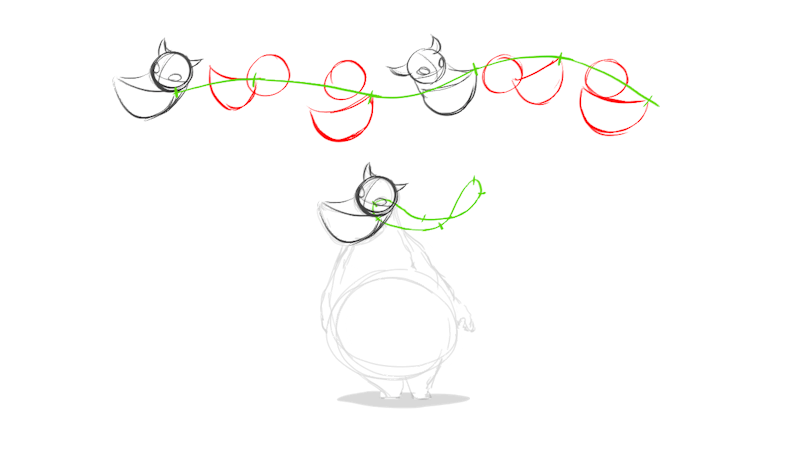
Also make sure to keep an eye on the arcs of your animation. I’ve only chosen four points in this animation to illustrate the arcs, but look at the arcs all over the animation. You may have noticed that the arc on the green ear above is not that great when it goes back down to the left.
Click the GIF below to animate!

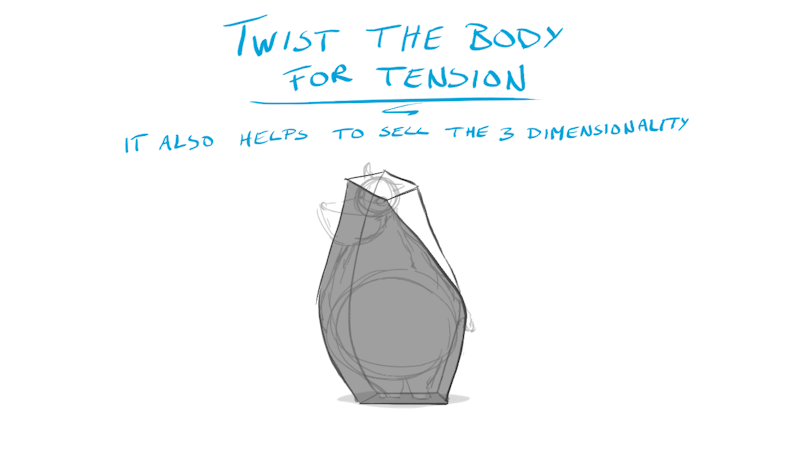
Twisting the body is great for creating tensions and selling the three dimensionality of your character. The longer you hold the twist and the more extreme you go the more tension is built up.
Click the GIF below to animate!
There you have it! That was my process for this particular exercise, I hope you found it useful! The most important part is to just try to have fun with it and experiment with your animation.
If you have any questions, feel free to drop a line in the comments below!
Magnus Kravik
is a Storyboard Revisionist
http://magnusanimationportfolio.blogspot.ie/
We Love Animation®
Brown Bag Labs is an exciting online space, brought to you by Brown Bag Films. We share great content for families as well as behind the scenes fun and tutorials from the Brown Bag Films team.
Get our great newsletter!
Get our great newsletter!