
The Old Workshop #Tutorial
- Behind the Scenes
- Tutorials
- Posted by Anahita Tabarsi on May 23 2019
Share Tweet
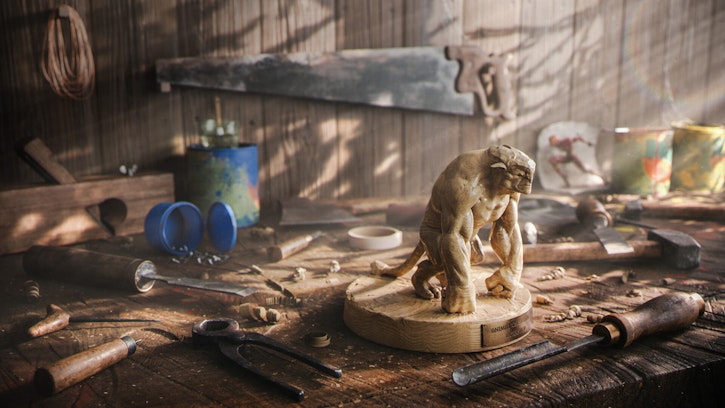
Time for a tutorial! And, we've got a special little treat for you today… our Senior Character Modeler, Darko Mitev, takes us through a breakdown of 'The Old Workshop', a piece he recently created for one of his courses!
Darko: This piece came together as a result of the 5-week course that I taught for Animation Skillnet Ireland titled 'Texturing and Look Development for Production'. Beforehand I spent a few days modelling the various tools and props for the scene.
References and Modelling
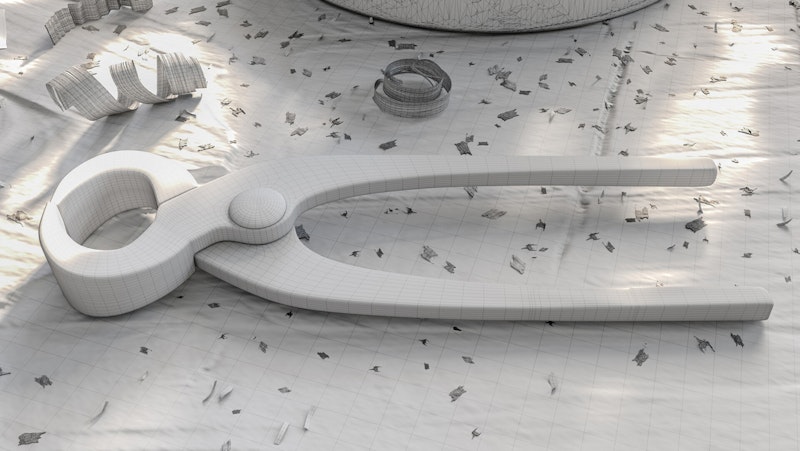
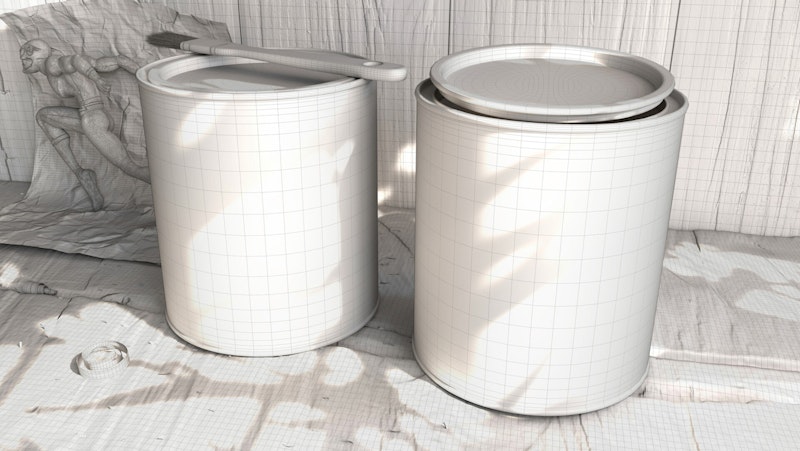
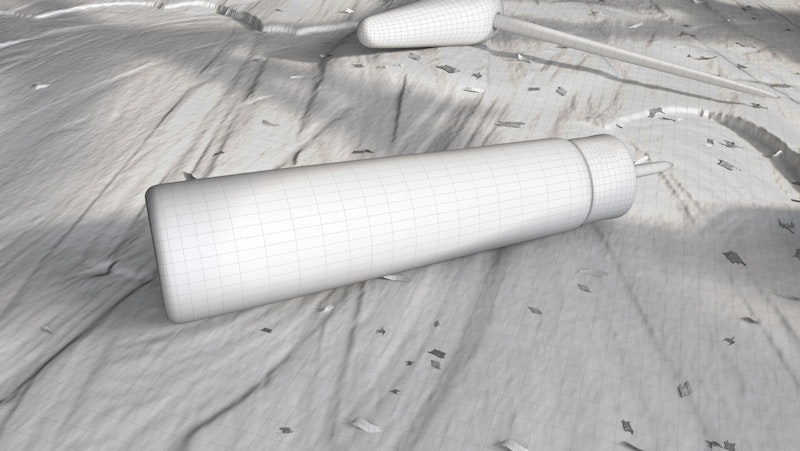
The modelling was a very straight forward process I collected a lot of references of real-life props and started to model them one by one.

I used basic Cube and Edge extrusion methods to model.

For more info and demonstration on how the models were made, you can take a look at the timelapse videos I have on my YouTube channel:
Texturing and Shading
The texturing of this scene was done entirely in Substance Painter. The goal was to push Substance Painter as a production tool, and deliver very realistic and more importantly, cinematic results.

One thing I used heavily in the texturing process was real-world photographs in combination with the substance procedural methods. Good resources for textures are POLIIGON, textures.com, Quixel Megascans, and Friendly Shade.
The process for texturing the tools was the following:
- Bake maps in Substance Painter for procedural workflow
- Find a good base texture that I can use as a starting point
- Start layering effects using the fill layers and the grunge maps to get different effects like edge scratches, dirt etc.
- Add additional layers to break up the reflection and roughness
- Add overall dust effect on top of everything

Lighting and Rendering
The lighting of this scene was not complicated at all. I started to light the scene using one dome light and an HDRI texture that I got from HDRI Haven.
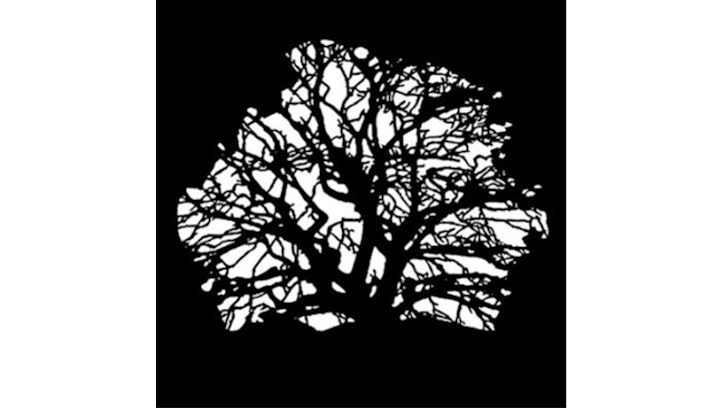
After that, I added one spotlight to serve as my Key Light to represent the sun coming in through a window. To simulate the leaves of a tree outside the window, I created a light gobo that I plugged into the spotlight. That is nothing but a black and white image with a silhouette of a tree.
I also enabled volume fog for the spotlight to get the sun rays effect. That really adds a lot of atmosphere and depth to the scene.
Because the intensity of the spotlight was not really strong I added area light behind it with the same colour but stronger intensity, to fill the scene with more sunlight.
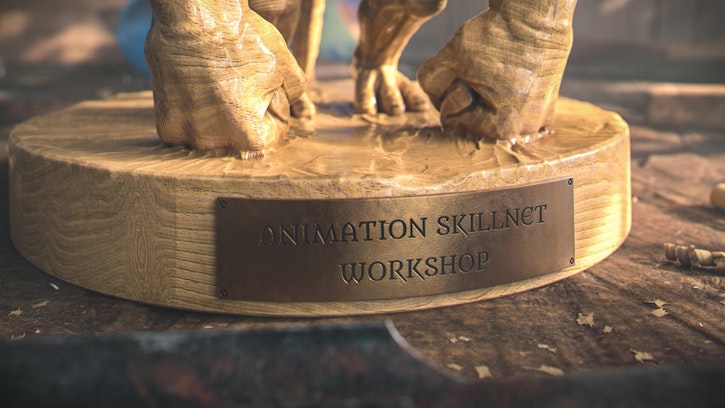
Last but not least, I added one more spotlight that was light linked only to the wooden sculpture to give it more kick and to make it stand out a bit more. That also helped to get the nice reflections on the statue.
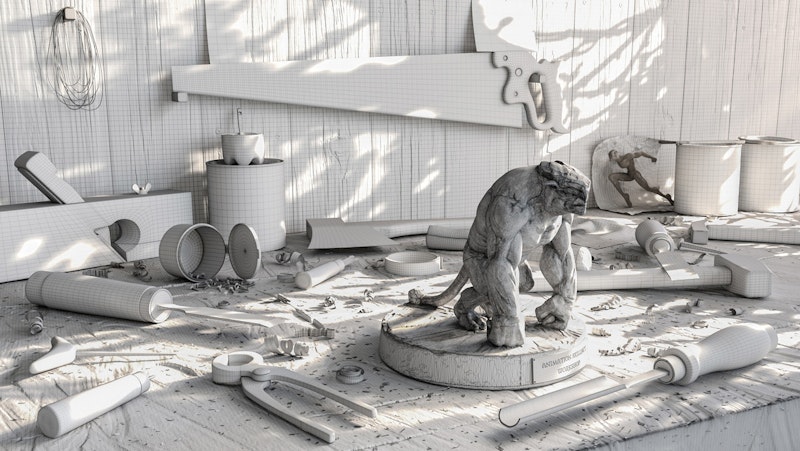

The compositing for this image was very, very simple. I rendered the beauty pass along with ambient occlusion that I set to multiply and then I applied my colour correction using Camera Raw Filter in Photoshop, and the image was done.
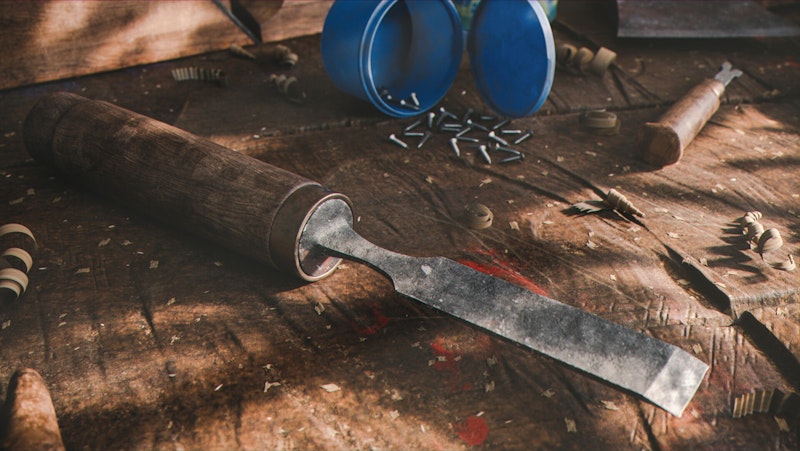
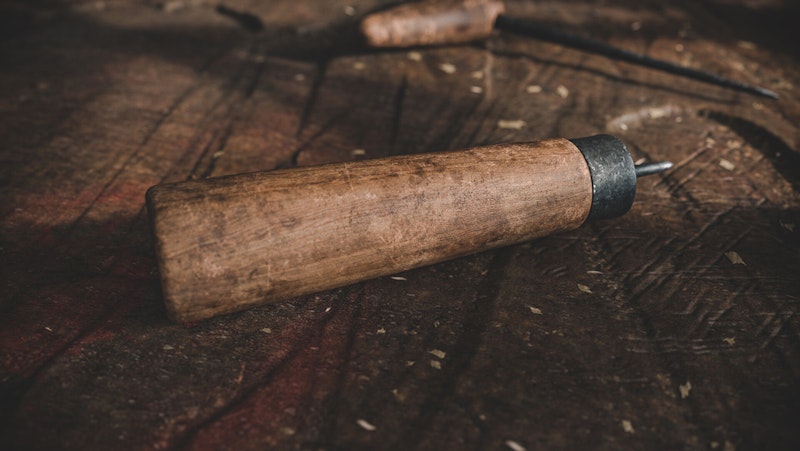
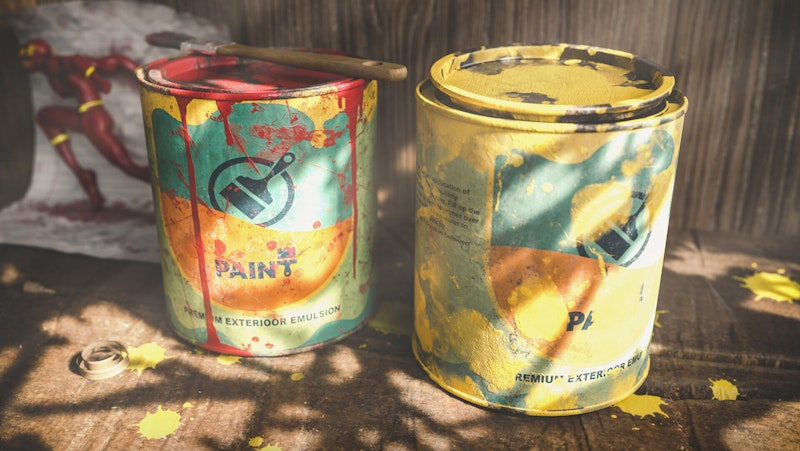
The very last thing I did after I finished the image was to render out a few close-up renders of the various props on the table to showcase my work.
That's it, I hope you find this breakdown useful, and thanks for reading!
To see the final render and the close-up images, and for more work from Darko, you can visit his ArtStation!
Anahita Tabarsi
Anahita is Brown Bag Films' Marketing Director, Digital & Social and drinks more than five coffees a day...
We Love Animation®
Brown Bag Labs is an exciting online space, brought to you by Brown Bag Films. We share great content for families as well as behind the scenes fun and tutorials from the Brown Bag Films team.
Get our great newsletter!
Get our great newsletter!