
Stag Project #3DPrinting
- Behind the Scenes
- Watch Now
- Tutorials
- Kids & Families
- Posted by Sean Forsyth on February 18 2015
Share Tweet
3D Printing
This was our most exciting 3D print project to date as we had not yet got our own 3d printer. We decided to try to push what we could do with 3D printing, and decided to model, print and then paint a piece.
I started off not really knowing what to make, so thought I'd do an animal head in ZBrush and see where it went. As you can see from the images below, I started with a Dynameshed sphere in ZBrush, and roughed out a Stag head.
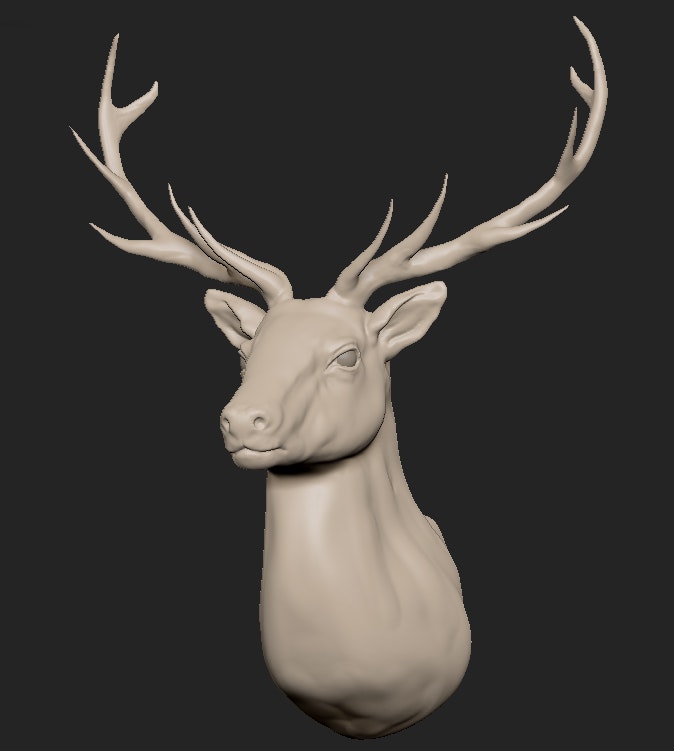
Once this was roughed out, it was looking a little boring, and I wasn't sure it would give us a whole lot, so I decided to model out the rest of the body too. Using the amazingly powerful functions of Dynamesh, which allows you to just keep adding geometry as much as you like without losing much detail as you work, I pulled up google image search, typed in Stag, and went to work. Like some kind of super-idiot, I didn't save the time lapse (as I forgot to turn it on), but here are some ZBrush renders of the completed sculpt anyway.
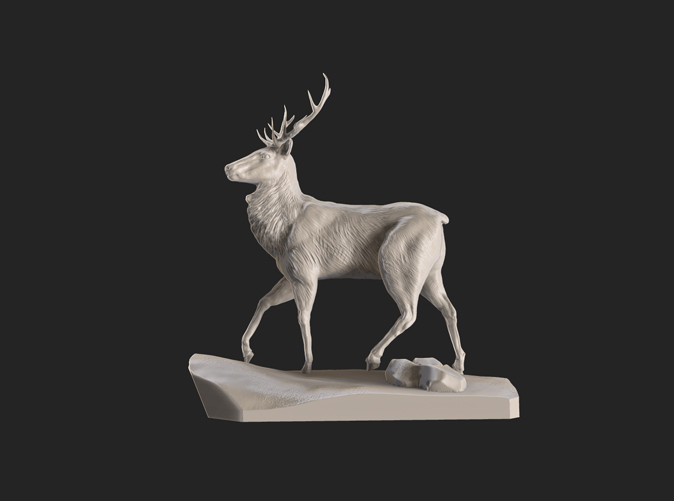
And here's a turnaround of the model before I cut the base down to a more manageable shape.
As you can see, I decided to add a base to it as the legs are so slim that there's no way for me to ensure that it would be balanced on them once printed. He was only really standing on 3 legs (and barely at that), and I didn't want to compromise the pose by having him standing on 4 just for balancing a print, so printing the base seemed the best option. Obviously, doing a base meant that I also had the opportunity to add some rocks, etc, which, in hindsight, I wouldn't do again, as these can be easily added after the fact using real stones. Also the base could have been made from real stone, which would have given the whole model more weight and also been far cheaper to print too! (Roughly half the model is just the base, so this is unlikely to be a mistake repeated if it can be avoided at all). Having said that, I would have had to either model some pin shaped dowels under his delicate little feet or just glued him to the rock, and I'm not 100% sure either of these are great options.
After using the hollowing out model technique described in a previous tutorial, this model was then reduced to under a million polygons (which is a Shapeways requirement - that along with a maximum STL filesize of 64MB), and exported at various sizes. Shapeways doesn't allow you to upload a model and change the size after the fact, as the STL format doesn't store different units of measurement natively, so if you want to try out different sizes you have to export your model at those sizes and upload each individually (sucks, right? There are other bureaus that allow you to scale your model, hopefully Shapeways will see the error of their ways and allow that in the near future also).
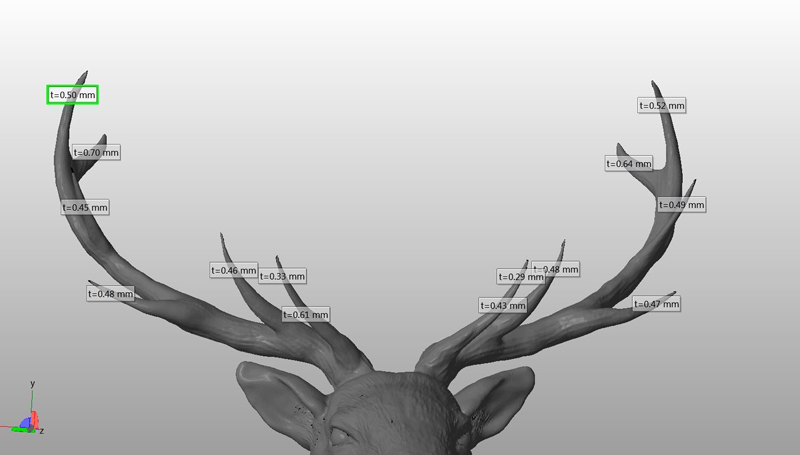
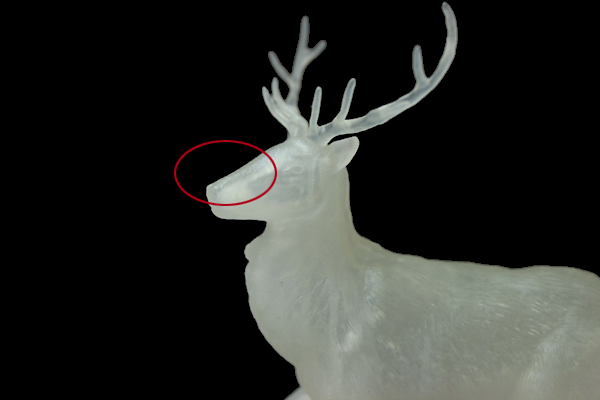
One thing the Shapeways site does attempt to do is check your model to ensure it will be valid to print, and the model failed it's initial test. They provided this handy image explaining why it failed, so I could see that it was just a matter of thickening out the horns that were too thin and reuploading the model (the Materials page has a description of how thick to keep your model shell and details in order to print properly, so in this instance these marked areas needed to be minimum 1mm thick).
We had chosen Frosted Ultra Detail as the material to use, as it promised ... er… ultra detail. This cost €78, which seemed high for a 11cm tall model, but we wanted to see how detailed you could go.
To give you an indication of the costs involved, I made several sizes and uploaded them to compare prices.
10cm high model = €59.46
11cm high model = €77.88
12cm high model = €99.95
As you can see, every extra centimetere in height comes at a significant increase in cost, so removing the base would have not only given me more height to work with, it would also have reduced the cost. Lesson learned! I opted for the 11cm model and sent it off as we were all eager to see it and I didn't want to totally rework the model.
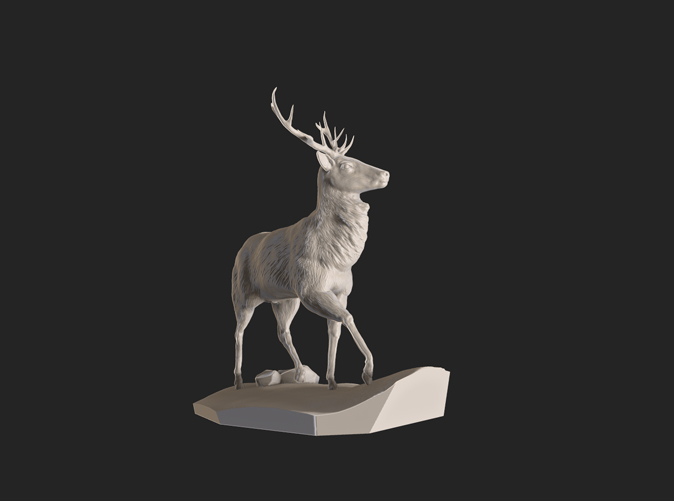
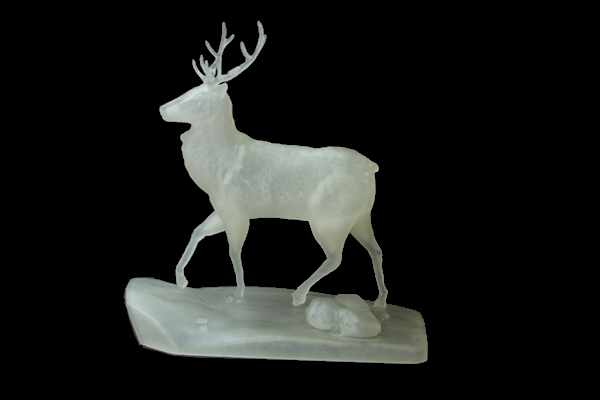
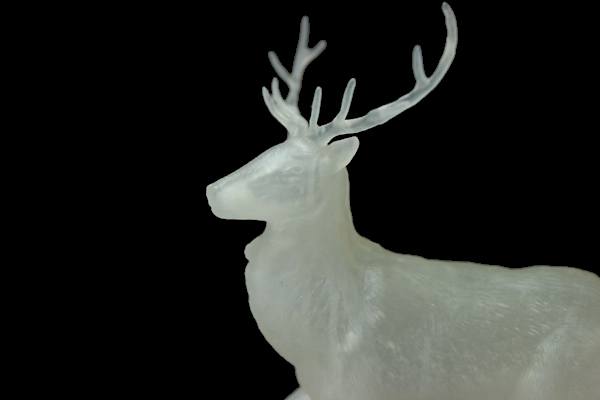
It came back about a week later and I have to say it looked great! It was still in it's frosted form, so it's hard to make out the finer details in these images, but it's there alright.
Images of stag in frosted ultra detail
Hollowed out details
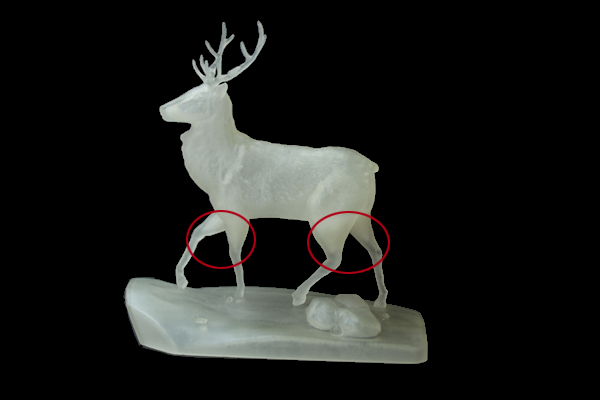
As you can see, the hollowed out areas are evident in this material. The model was hollowed out but as the thickness required meant that the legs could not be hollow, some material didn't drain out of the hole under his belly, and gathered in the legs.
Hope you enjoyed that - and don't forget to check in again tomorrow for a look at the painting process and the final look of the stag 3D print!
Seán
Sean Forsyth
Sean Forsyth is an Art Director
http://theseanster.blogspot.ie/
We Love Animation®
Brown Bag Labs is an exciting online space, brought to you by Brown Bag Films. We share great content for families as well as behind the scenes fun and tutorials from the Brown Bag Films team.
Get our great newsletter!
Get our great newsletter!