
“How to Train your Dragon” Inspired Painting Process #Tutorial
- Behind the Scenes
- Tutorials
- Posted by Eoghan.Lynch on September 05 2019
Share Tweet
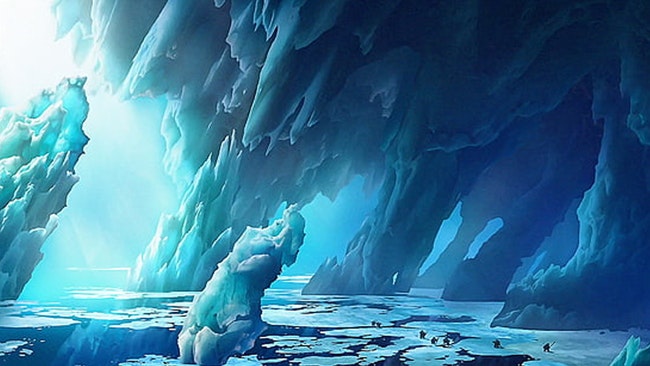
Time for a tutorial! Our Dublin studio 2D Designer, Gavin O'Donnell, came up with this stunning piece of concept art inspired by “How to Train Your Dragon”. We liked it so much we asked him to show us how he did it!
Gavin: This is a quick look at how I went about studying this piece of concept art inspired by How to Train Your Dragon. The idea with this study is to capture the palette, mood and composition. You have to watch out for getting lost in the small details as this is not important for a study like this.
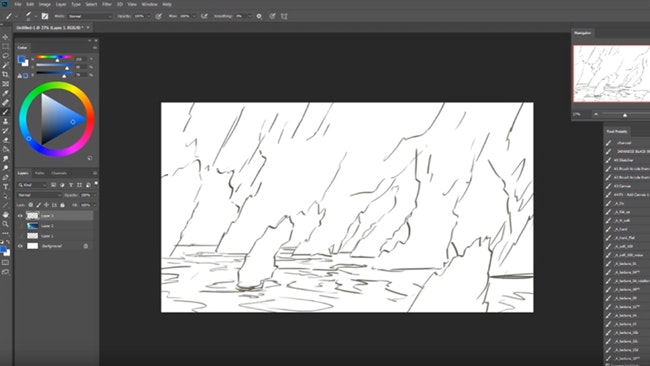
I start by making a small sketch of the icy world, trying to make everything line up somewhat accurately. Again though, don’t go overboard on this either, just try to get it as close as you can manage.
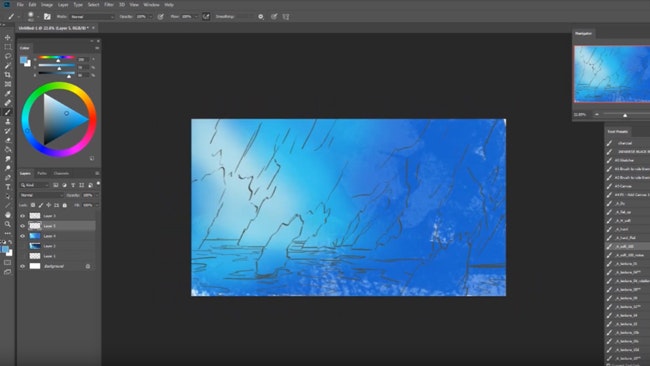
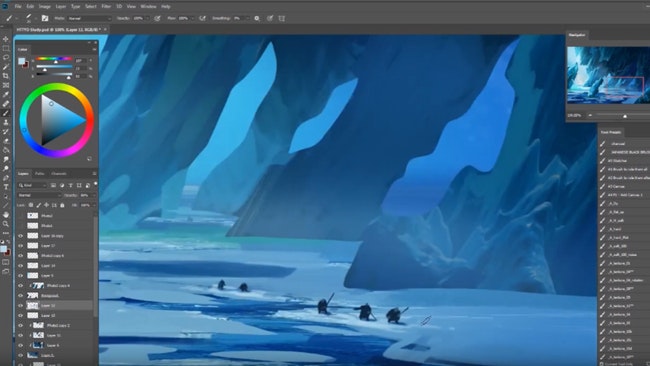
For the next step, I’ve created a layer underneath my line-work. I’ve used a chalky brush and soft brush to get the lighting of the background into place.
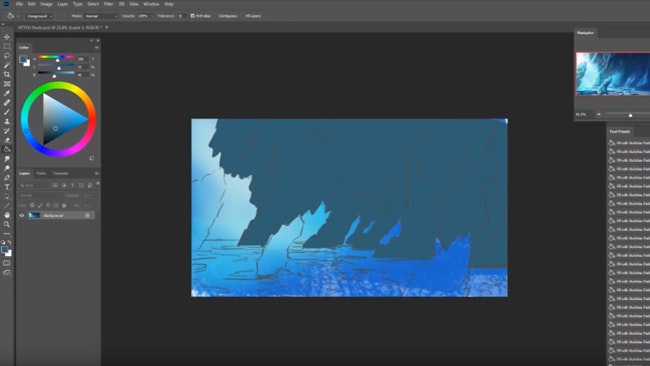
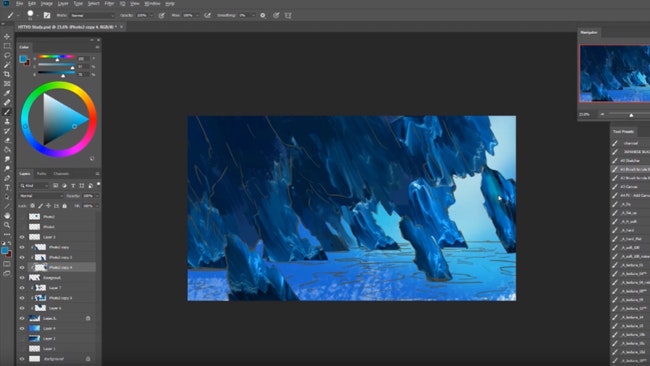
Next, I isolated out the main chunks of ice onto their own layers using the lasso tool for a clean selection. This makes painting into the ice easier and cleaner when you’ve got the layers transparent pixels locked.
I start adding some shadows to the layer and next, I’ve grabbed a section of an iceberg (you can find this type of image using Google or Pinterest) that is close enough to the type in the original, I’ll start dashing/replicating this around the chunk of ice, distorting and manipulating it into place.
I use the Hue/Saturation adjustment to bring the values of each photo down. From here I’ll just start painting on top and making them all feel like part of the same structure.

I’ll repeat the same process for the ice structures in front. With this technique, you avoid getting lost in the details and really quickly you get a solid base for the overall iceberg structures.
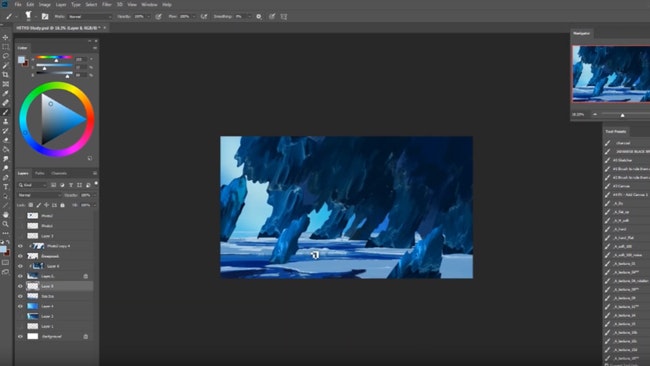
In this next step, I’ve brought in a photo of some broken ice that's in the correct perspective and scaIe that I’m looking for.
I’ll start painting and cutting into this further and also making Hue/Saturation adjustments to make it fit into the image.
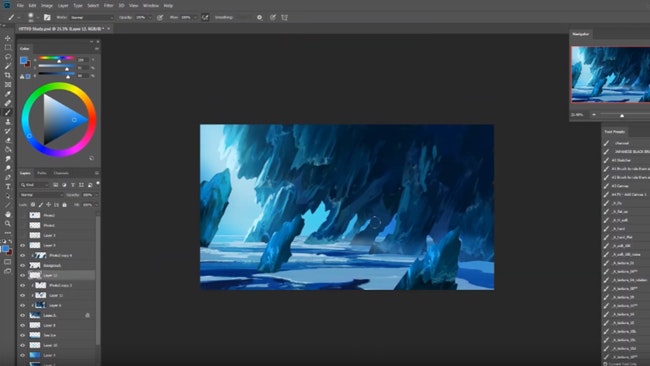
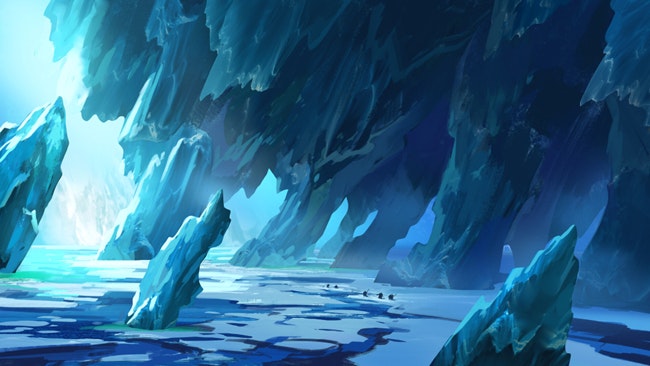
Now that we have all the elements in place, I’ll start adding some bloom, highlights, and atmosphere to the image. This really helps to push the scale and make these structures feel huge.
When I'm adding bloom, in this case, it's that brighter light coming from the top left. It can be good to experiment with layer modes like lighten or screen when trying to achieve this. Grab a soft or cloudy brush and start gently adding in a lighter tone.
You'll generally have to play with the opacity of the layer too. The same techniques can be used for adding highlights but with a harder brush.
From here on out, I’m adding some minor adjustments to the overall image, jumping around and adding some smaller details but not too small, we don’t want to get lost.
I brought in another photo element into the background and masked in the pieces I liked and adjusted the opacity to make the atmosphere feel like it's affecting its values.
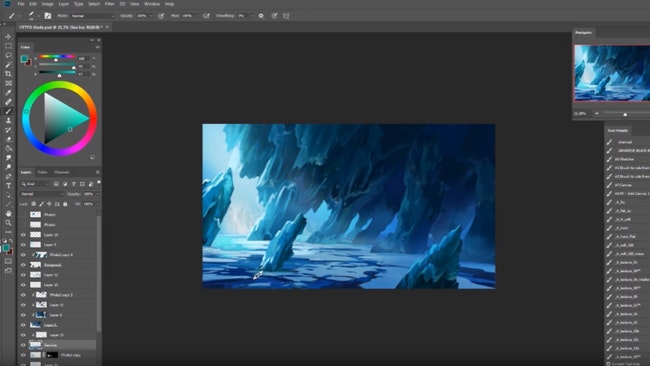
In the final step, I add in the little characters, they’re quite far away so you can be pretty abstract and loose in how you paint these little guys in.
I added a little highlight to the area around them as well to help draw the eye over to that area.
Characters like these are great for adding to the scale of an image. Straight away the viewer has something to relate to.
And this is the final result!
Hope you enjoyed that! You can view more of Gavin's artwork over on his ArtStation and if you have a question, please pop it in the comments below!
Eoghan.Lynch
We Love Animation®
Brown Bag Labs is an exciting online space, brought to you by Brown Bag Films. We share great content for families as well as behind the scenes fun and tutorials from the Brown Bag Films team.
Get our great newsletter!
Get our great newsletter!