
Time for a tutorial! And, we've got a special little treat for you today…
CG Generalist Darko Mitev takes us through a breakdown of his work on Liga 01's Elvenar, detailing the process with focus on modeling, texturing and shading.
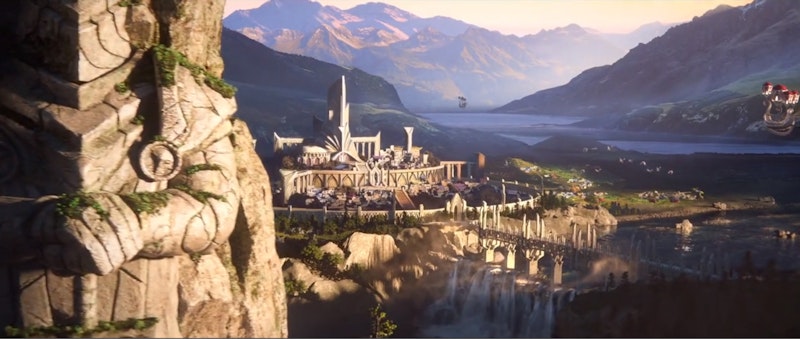
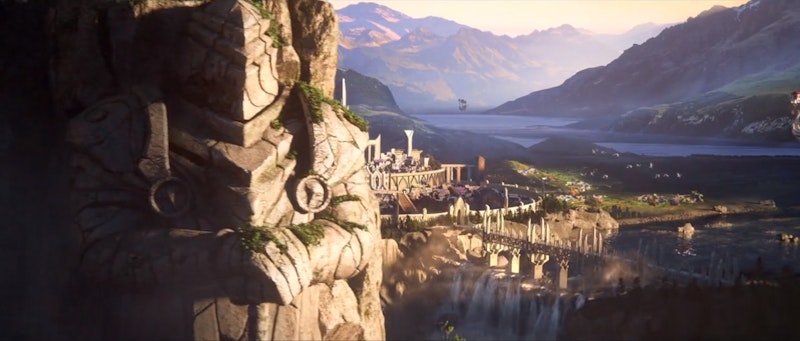
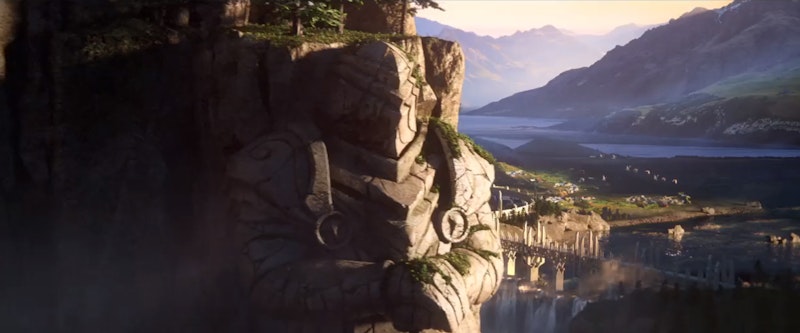
Darko: As part of a recent freelance project I was tasked with the job of creating several assets for the opener of the Elvenar trailer. Part of this was building a cliff face with the carving of an elven knight embedded into it and some of the overgrown, lush landscape surrounding it.
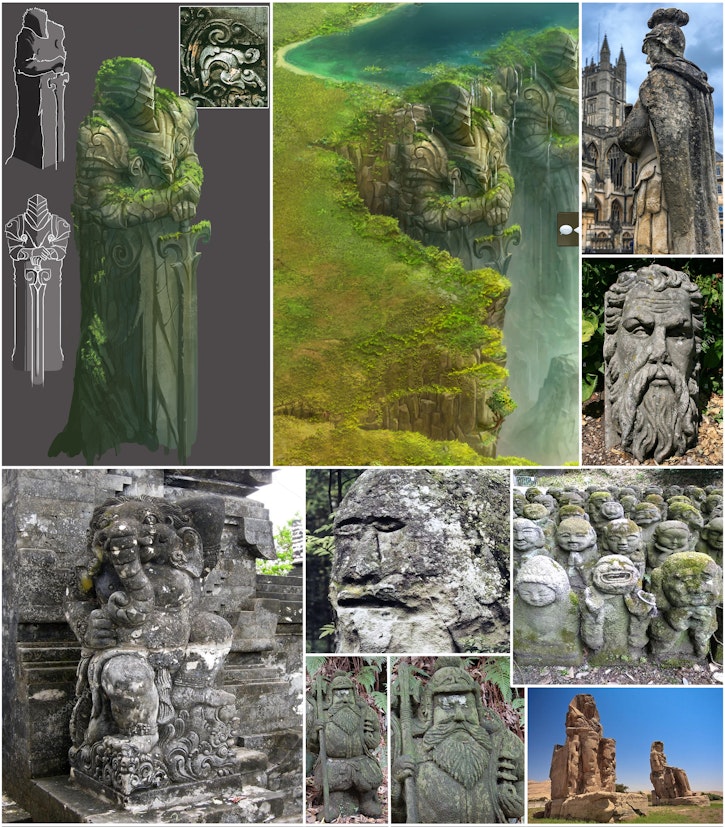
Before I normally start working in 3D, I like to get as many references as I can. So, I usually create a reference/mood-board that I will refer to while I am modeling.
My mood-board usually consists of any concept art that my clients provide and personal references for the look and feel of the subject, such as material, texture, shape etc.
The carved cliff face statue is one of the first assets that I was to build. The client sent me the Camera from the Layout Animation and a dummy object for the statue that showcased the size and placement of it in the shot. Using that as a guide, the concept art, and many photo references, I started to model the statue, keeping in mind that the cracks and details should match its size.
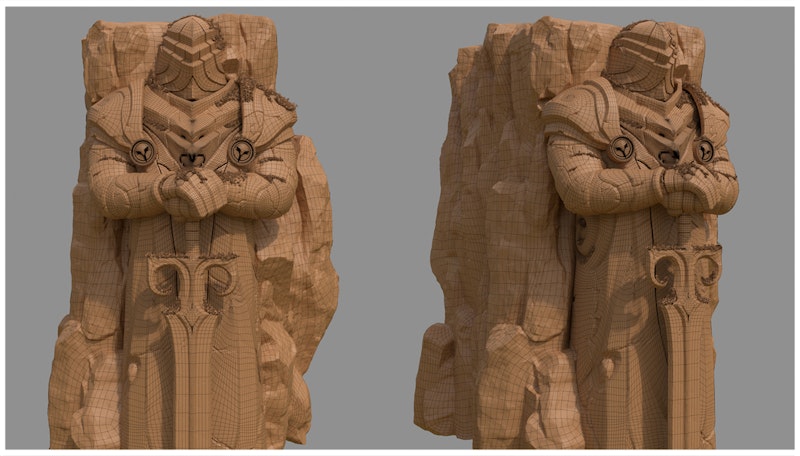
Using the references and concept art, I first created a low block mesh to establish the main volumes and silhouette of the statue.
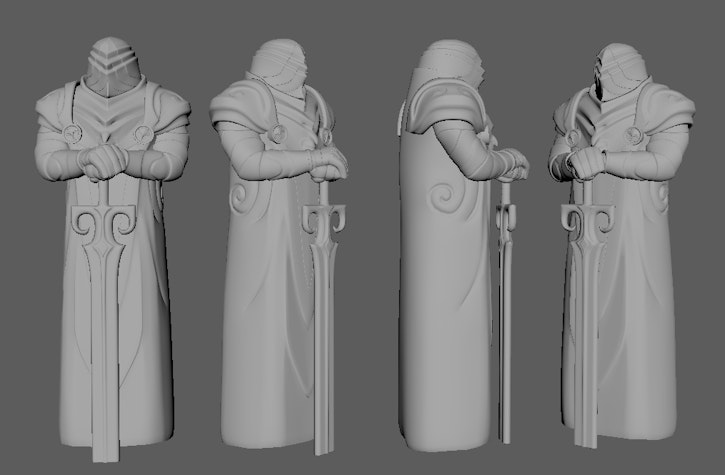
After that, I selected the edges that I wanted to be sharp and applied creasing to avoid subdivision modeling because the model was subject to change.
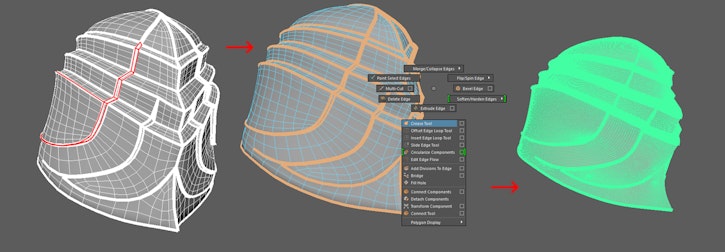
After I was done creasing and subdividing all the objects in Maya, I exported the high res version as a .OBJ and import it in Zbrush for sculpting.
If I needed more geometry, I subdivided the geometry even further at this point or even went to HD geometry.
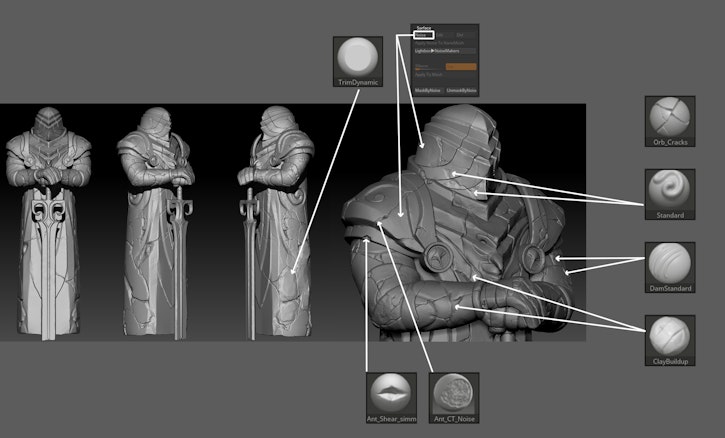
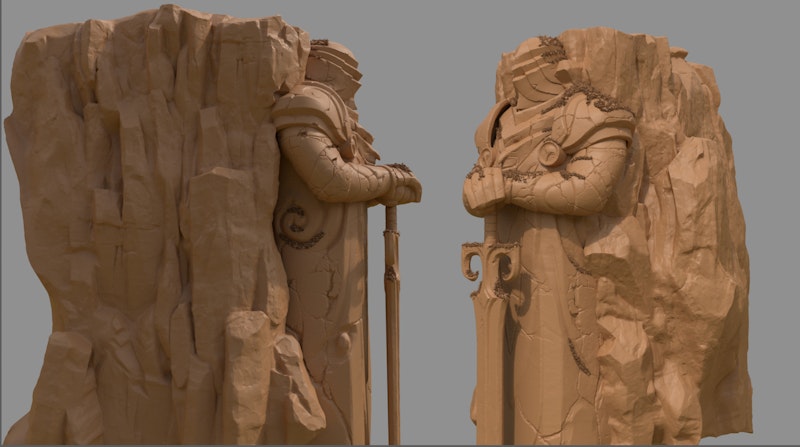
The sculpting itself is nothing special, I used just a handful of brushes such as Standard, ClayBuildup, DamStandard, TrimDynamic, as well as some third-party brushes that I downloaded online, like the OrbCrack brush and the A_brush Pack by Michael Vicente.
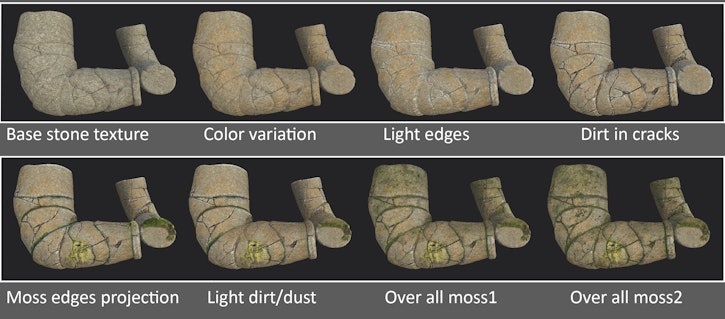
For some of the surface details, I used the Noise Plugin in ZBrush, but I kept this really subtle because I wanted most of my high-frequency details to come from the texture and normal map.
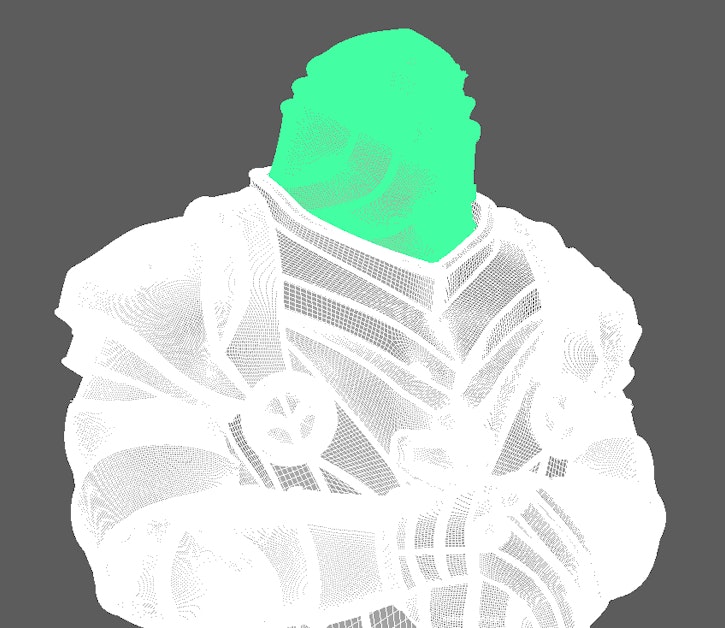
After I was done sculpting all the details, I went to the geometry tab and clicked on the “Reconstruct Subdivision Levels” button (multiple times). This regenerates a lower polygon version of my mesh, that I can use in Maya for the final rendering.The details from the sculpt I would recreate using Displacement maps.

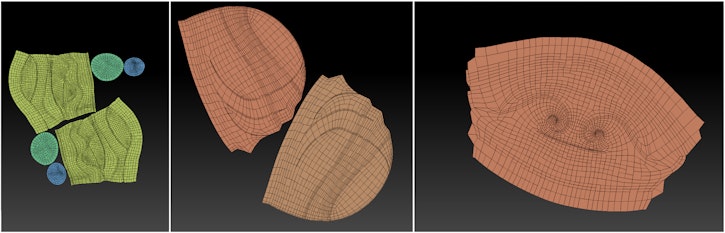
After generating the Low poly geometry, I exported it to Maya, did some minor clean up, and generated the UV coordinates.
Back in ZBrush, with the lowest subdivision level active, I import the new geometry replacing the old one. This process allows me to preserve the sculpted details, and also to preserve the tweaks on the geometry I've done in Maya, as well as the UV coordinates.
After the texturing was complete, I created a small grass and plant library to use as scatter objects inside MASH for Maya.
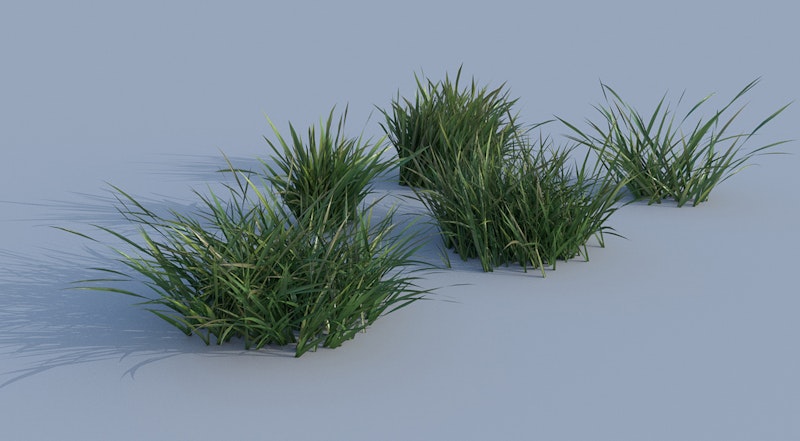
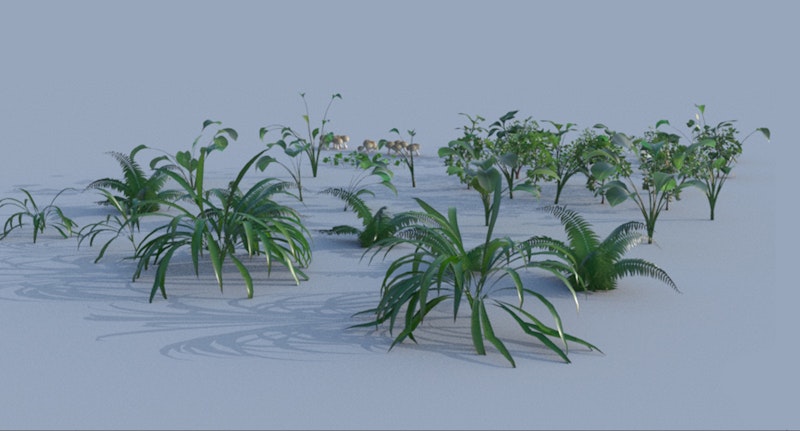
To populate the vegetation, I extract geometry from Zbrush using Masking and Extract. I then use that geometry in Maya to scatter vegetation on the statue.
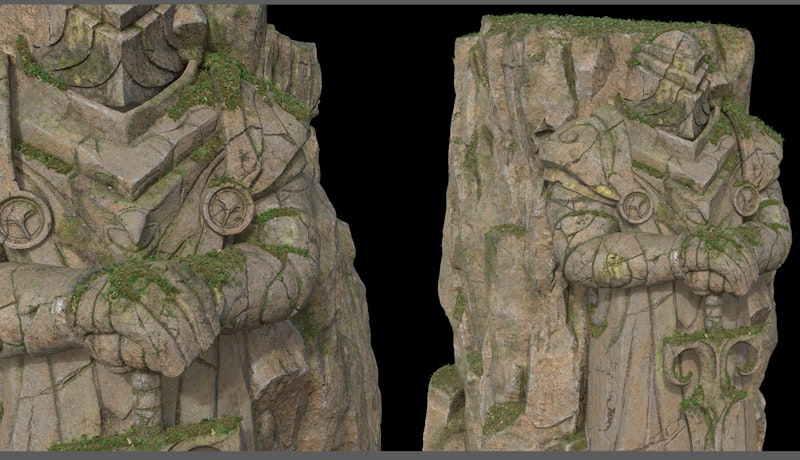
After I submitted my model to the client, they did the final lighting, rendering and comp, and this is the final result.
You can see the trailer for the game with this opening scene here:
I hope you find this breakdown useful and inspiring and use it to try and create something too!
To see the breakdown of the other assets, please visit: darkomitev.artstation.com
If you have any questions about the process feel free to drop them in the comments below.
Anahita Tabarsi
Anahita is Brown Bag Films' Marketing Director, Digital & Social and drinks more than five coffees a day...
We Love Animation®
Brown Bag Labs is an exciting online space, brought to you by Brown Bag Films. We share great content for families as well as behind the scenes fun and tutorials from the Brown Bag Films team.
Get our great newsletter!
Get our great newsletter!