
Hey everyone!
The following is a walkthrough of the various steps I went through to create A Dance of Light - all told, it took about three months, pinching a half hour here and there before and after work. I’d say maybe 50 hours in total.
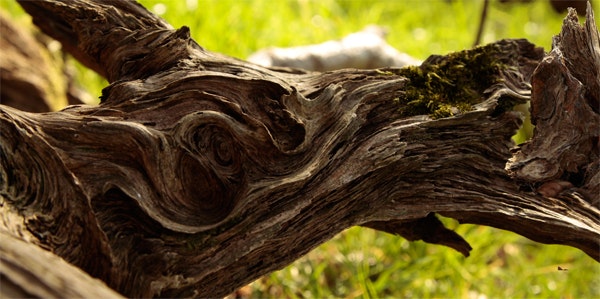
Wood Dragons always start the same way for me – I’m out in the forest somewhere, and I come across an old twisted branch, or a mossy tree stump, or a piece of old bog oak, and I find a feature. An eye, a snout, a jaw – something that leaps out at me. I then photograph that branch/stump from every conceivable angle, so when I start to use the images as texture fragments or painting reference, the light is unified. This was part of an amazing desiccated stump I found up on the Kilruddery Estate.
Eye, jaw, snout….it was a great start!
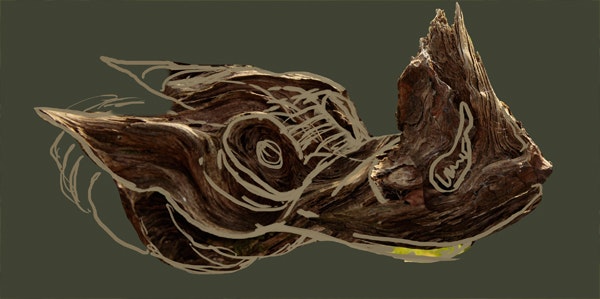
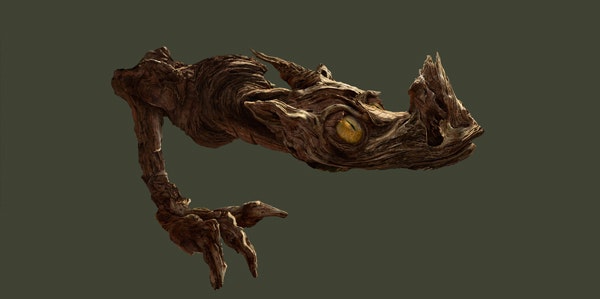
I start by roughing in features, rearranging elements to define a shape. I’m just going to concentrate on the head for the time being. At this early stage I have no idea what kind of anatomy the Wood Dragon will have – I always find these things emerge as I work into them. I want this to be a three-quarters view of the Dragon’s face, so I block in the features accordingly.
Using slivers of photography, I start to build up the structure of the face. Once I have a few strips of bark laid down, I can start to paint, using these photographic elements as my palette and light reference. It’s important that the painting and the photographic elements are seamless.
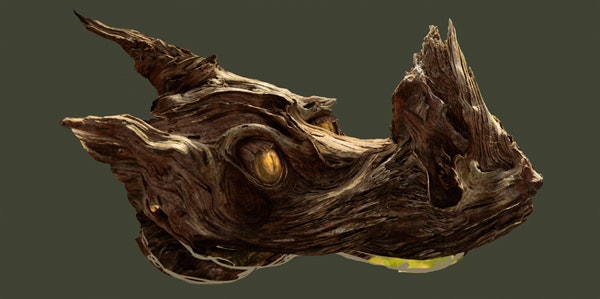
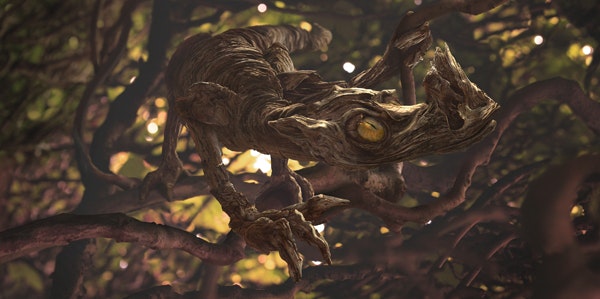
The next phase is all about finding the Dragon’s personality, his character. The eyes are too small, and a little lifeless, so I enlarge them, make them more child-like. Lots of painting here to add structure, detail, and character. I start to extend the body backwards.
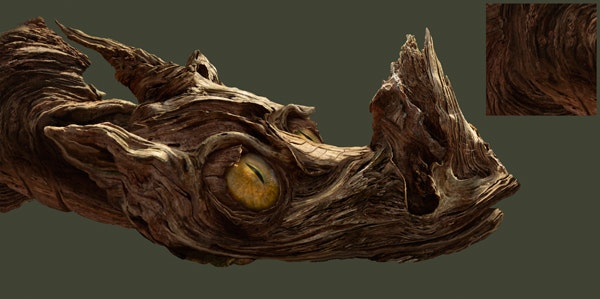
I know he’s going to be reaching out, curiously, so I start working on the right arm. At this point I start to think about the rest of the body – what kind of anatomy, what kind of pose I want. This is dependent on the environment I want to place him into.
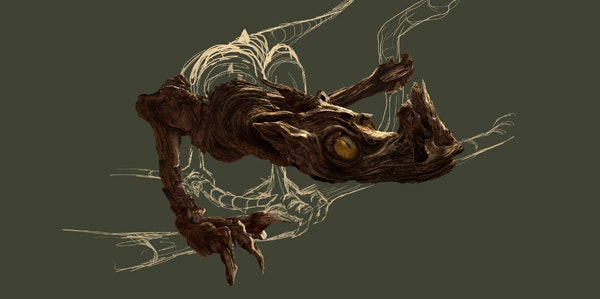
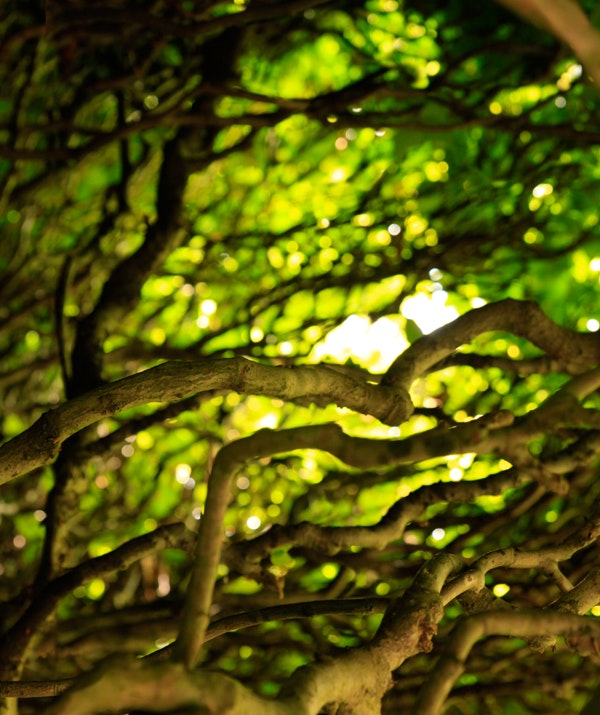
I want the camera to be looking down on to him, his body curling away as a nice counterpoint to him leaning in so curiously. I sketch in the rough form. I know where I’m going to put him. A few years back, I was in Mount Usher gardens in Ashford and I happened to glance into a hole in a beech hedge (That’s the kind of thing I do!) The sunlight was streaming in to this incredibly complex environment and I knew I would use the shot someday as a background for a Wood Dragon.
It was time to dust if off!
I know there’s going to be major challenges getting him to sit into this scene, as there are so many factors at play in the photo. Obviously the light is vital to match, but also the Focal Length of the lens - the depth of field - is going to present complications. I figure the best thing to do is continue painting the Wood Dragon in full detail (even though I know I’m going to blur the bejeesus out of most of it when the time comes!).

I continue painting the Wood Dragon’s form, always referring to the photography, bringing in slivers every now and again to define the structure, then painting around them.
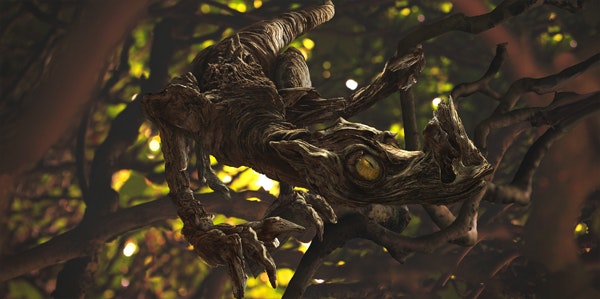
When I’m happy I have the anatomy and pose at a fairly complete stage, I drop him into the scene. What follows is extensive colour correction and balancing of values – both the background and the Wood Dragon himself. At this early stage I’m thinking of a reddish, autumnal palette, but the great thing about working digitally is that I can change that at any stage. This kind of work - the grading/light-matching - is really enjoyable. You feel like the image really starts to come together.
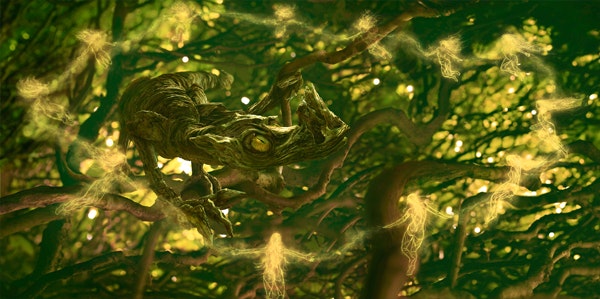
He’s really starting to sit in well now. I wasn’t happy with the position of his tail, and another set of eyes confirmed it (thanks Sean!). I’ve used blurs selectively to push back his tail and legs, gradually bringing it forward to match the depth of field of the original photo, as well as the sharpness across the focal plane. There’s still a lot work to do, but I’m happy with it at this stage.
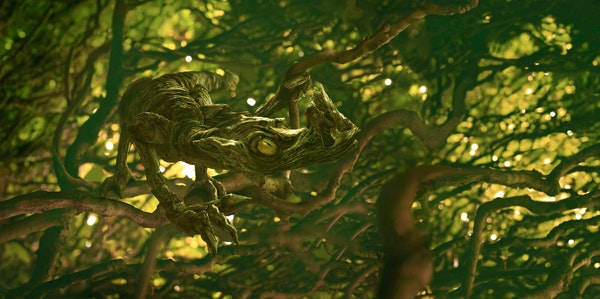
I feel like the composition is too narrow – I think the image will be served better by a wider, landscape format, so I spend a lot of time extending the image to the right. This is achieved using a combination of photography and painting to bring the two halves together. I also bring in a much richer palette, greens and golds. I think the image is starting to feel a lot more alive.
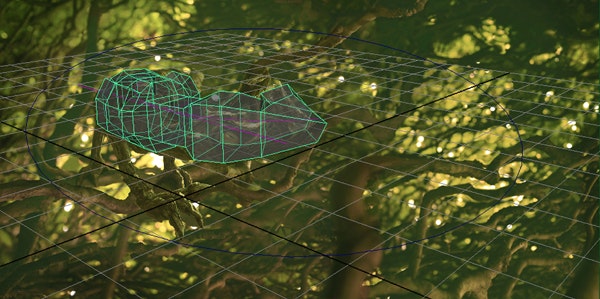
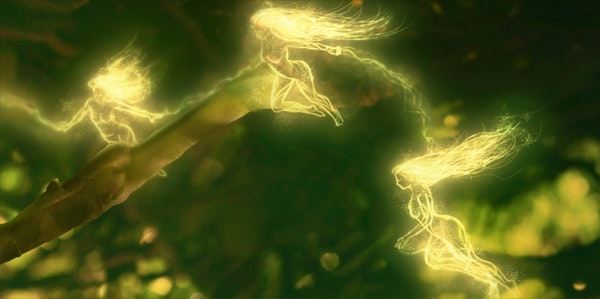
I know I’m going to bring the Fairy figures in now, so I need to mock the scene up in a 3D environment so I can accurately place the dancing circle. I model a very rough box mesh, bring it into Maya and set up an image plane in the background, matching the camera angle as accurately as I can. Now I have the scene set up in 3D space, I can bring in various reference models from Poser to define the dancing circle.

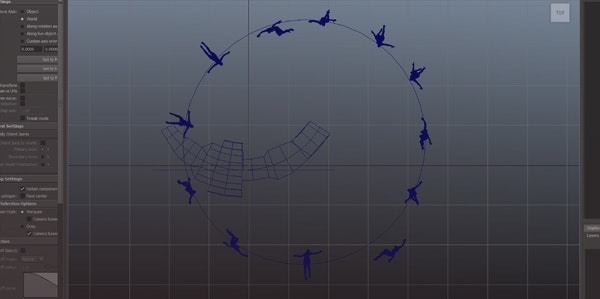
I bring the posed models from Poser into Maya and position them in the circle. Because I have the Wood Dragon blocked out roughly in 3D, I can position the fairy circle in such a way that I’ll know which ones to blur and which ones to leave sharp so I can mimic the depth of field, hopefully adding to the realism of the ‘photograph’.
The first thing I do is paint in the rough forms of the figures, using the imported models as reference. This is basically tracing over the anatomy, trying to capture the flow of their limbs (they’re supposed to be made of fire/light) in a very fluid way.

Once the figures are defined, I flatten them onto their own layer and really punch the light using Levels and Saturation on Adjustment Layers. This is the way to go when you’re painting light, as it’s non-destructive. I decided to resize them, bringing the circle in closer to the Wood Dragon to improve composition. I also blur them according to the Depth of Field I established in the 3D Mock Up. Once I’m happy with their glow, I go back around the image picking out highlights and pushing light/dark values to make the Wood Dragon really stand out. The last 5% of any image can often take as long as the first 95%, but for me it’s totally worth it – taking the time to push it as far as you can. Thanks to Andy for a great suggestion about brightness and saturation to create more of a vignette.

And this is the final composition I settled on - almost square, to give me options when I go to crop.

I’m looking at getting this printed as a Limited Edition on Aluminium (A2 - which is 59cm x 42cm). I’m waiting on a test print and will update this with photographs when it comes in - printing on metal is amazing - all the brights (ie the fairy glows etc) are actually the metal, so you get this incredible effect.
Thanks a million for reading!
You can find more of Phil's work on www.philmcdarby.com and www.adailyforest.com.
Phil McDarby
Phil McDarby is a Matte Painter and Texture Artist on Peter Rabbit.
www.philmcdarby.com
We Love Animation®
Brown Bag Labs is an exciting online space, brought to you by Brown Bag Films. We share great content for families as well as behind the scenes fun and tutorials from the Brown Bag Films team.
Get our great newsletter!
Get our great newsletter!