
Making of Furiosa Costume DIY Part 3 #CosplayForCancer
- Behind the Scenes
- Tutorials
- Posted by Siobhan Doyle on November 12 2015
Share Tweet
In the final part of the Furiosa Cosplay For Cancer DIY blog series (Part 1, Part 2), Lead Modeller Siobhan Doyle gives us an indepth breakdown of her DIY Furiosa Halloween costume and how she went about constructing it from scratch!
Siobhan: Cosplays are costumes that typically represent a specific character. Before you start making anything, it’s important to find as many reference images as possible. Sites like madmaxcostumes alongside gif sets such as this can really help you get started as well as inform what materials you need to use.
With Furiosa, I also needed to see her in action. There’s a lot of love put into her design, and much of it is purely decorative, but there’s more functionality to it than I first realised. Before I started looking for parts, I did a quick breakdown sketch.
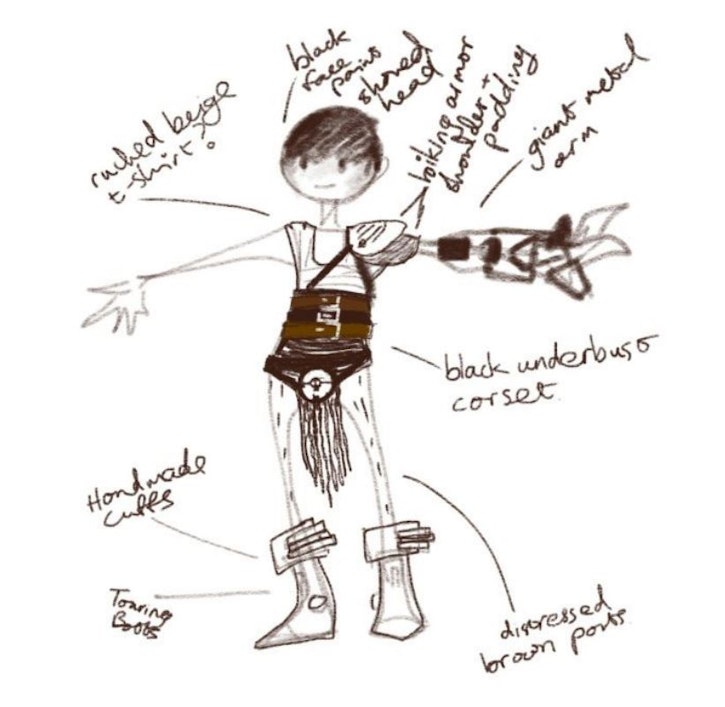
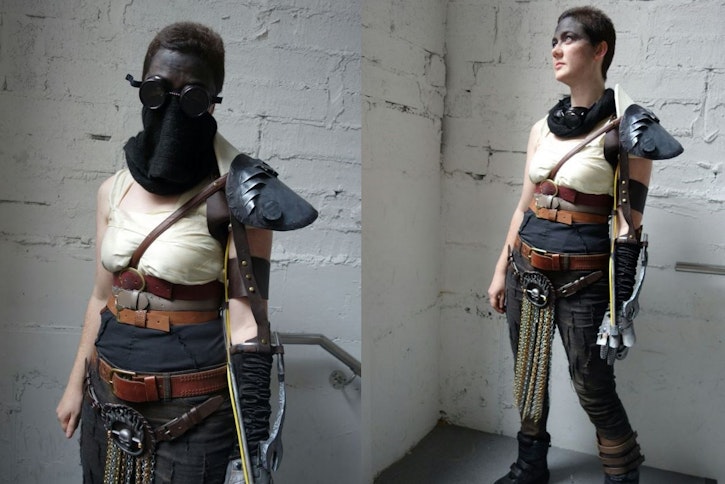
From this I worked in four separate parts. Clothes, shoulder rig, prosthetic arm and the emblem belt. I pretty much roughed each part out before working on the details.
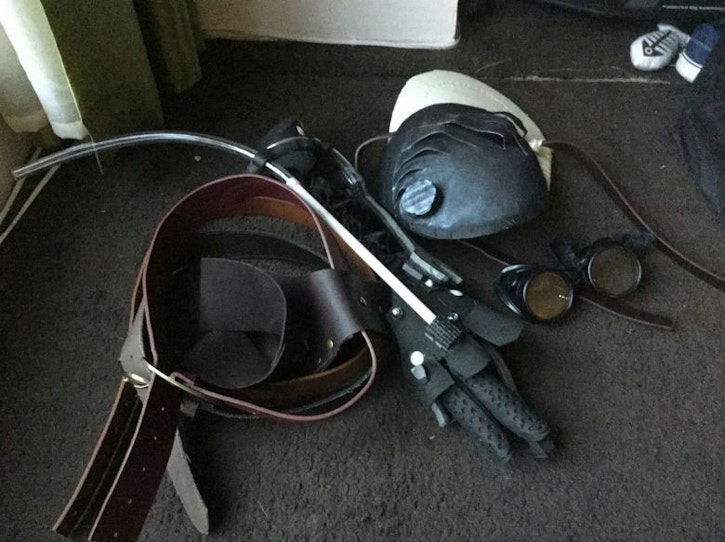
Clothes: “Motocross” jeans, Biker Boots, White sheet, Velcro, Black scarf, Welding Goggles, Sewing Kit, Spanks, Scrap Leather.
Some cosplays are all about trawling second hand and cheap clothing stores to find the look you need. In this case, it provided me with a pretty solid and recognisable base.
The jeans were ripped and sewn, but could have been embroidered with more time. The off white top was just a sheet ripped into strips and sewn back together into a wraparound style top. I used velcro to open and close the top, and a modified pair of spanks as a cheap replacement for the corset helped to hold it together. Brown and tan spray paint was used to make it all look dirty and dusty.
The last detail is the cuff above the left boot, which is made of soft scrap leather, held together by snaps, staples, glue, velcro and sheer will power. I was running out of some materials when I finished this off.
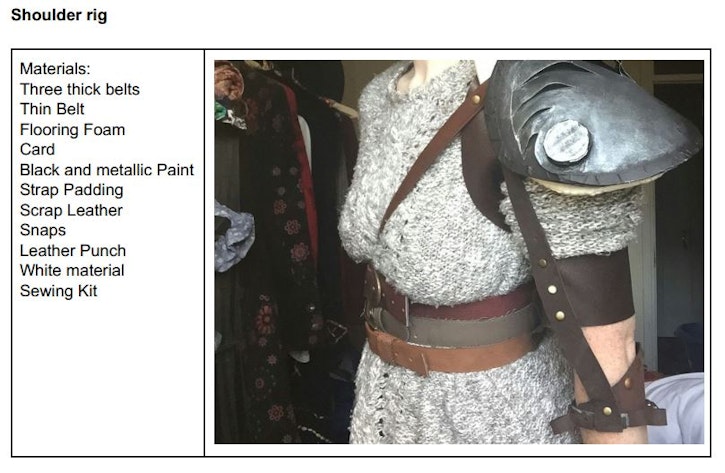
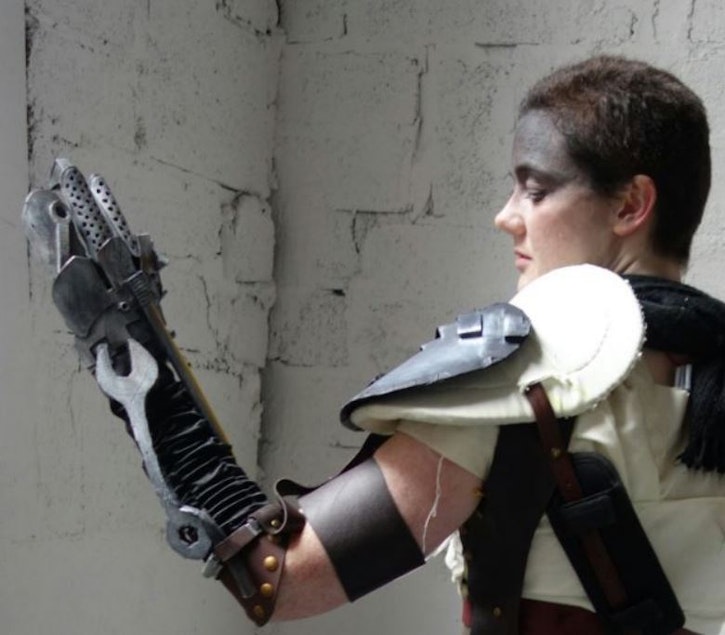
The arm and shoulder rig is the most complex piece of the cosplay. I used scrap leather to create the holster loop, which held the three main belts together. Flooring foam covered in fabric was used for the padding, but in hindsight, I’d recommend something much softer.
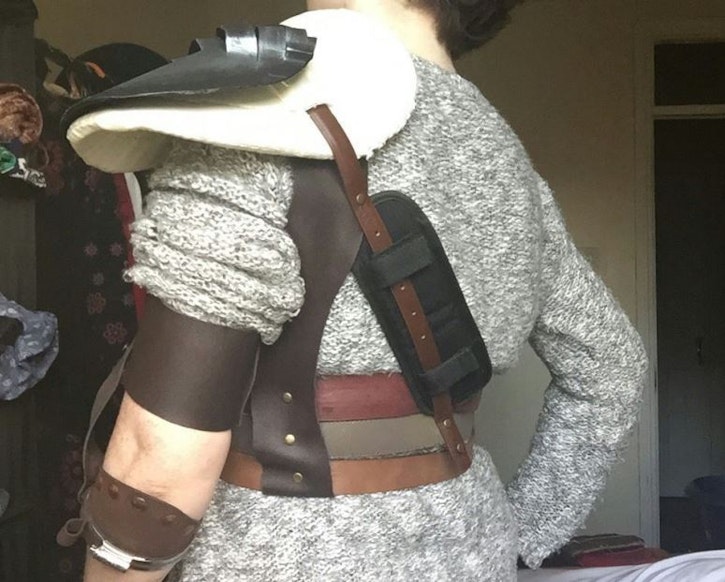
A smaller belt hooked in across the body held the shoulder and arm up.
In the film, the prosthetic arm is held on with this rig, but for simplicity, I kept the arm below the elbow separate. The skinny belt over the shoulder, is attached to the shoulder padding, and sort of held the whole thing up on my body.
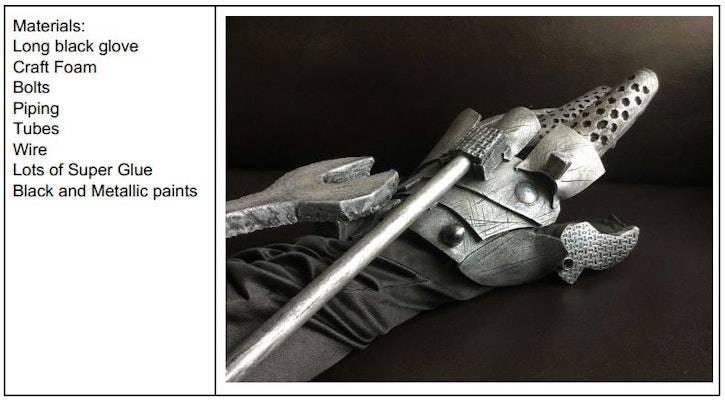
My glove was made by my talented housemate, MattyMakes. I started with a long black glove from a costume shop and he cut the shapes out and glued them to my hand… I mean the glove. Seriously, I think I lost some skin to super glue. But it’s actually pretty safe stuff, I just had to pry my arm back out.
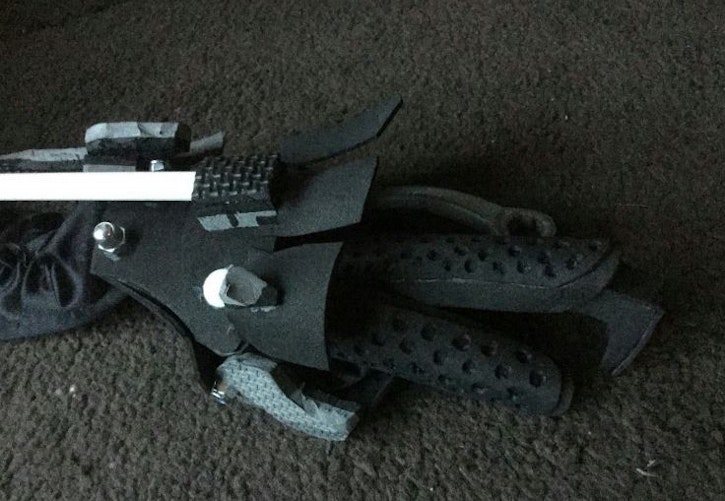
I then sprayed it black with some primer, and did a few layers of the silver paint using a dry brushing technique. Basically, you use very little actual paint, so you can’t get a clear stroke, and brush it over the detail lightly. It leaves cracks and deeper sections dark while picking out the edging really nicely.
Finally, I used a brown metallic paint to add rusting to the metal parts.
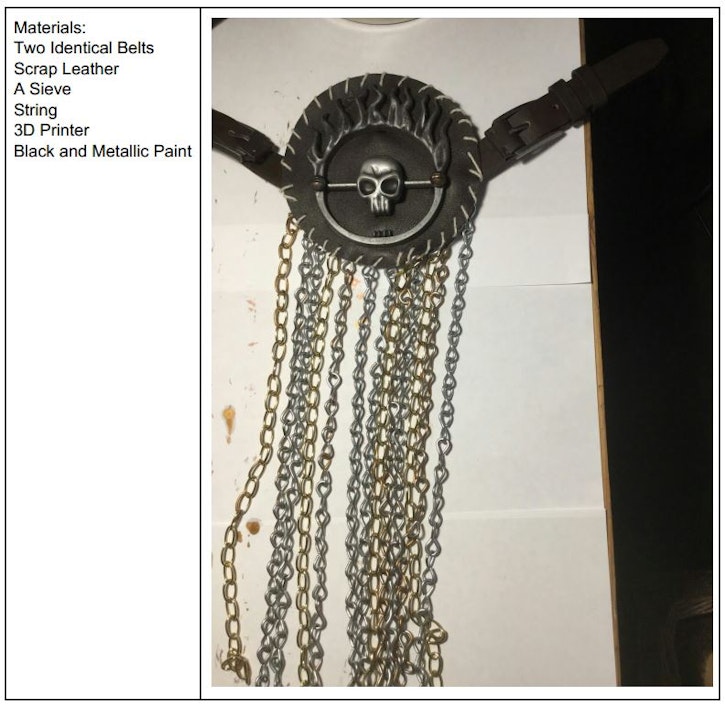
The belt was my favourite piece in the whole set. The frame was made from two identical belts, with a round piece of cut scrap leather in the centre.

The buckle (aka the fun part), I modelled in ZBrush, starting with rough, geometrical shapes, and then dynameshed into a single piece. I then scratched it up a bit and added buttons to the back so that it would be easier to mount.
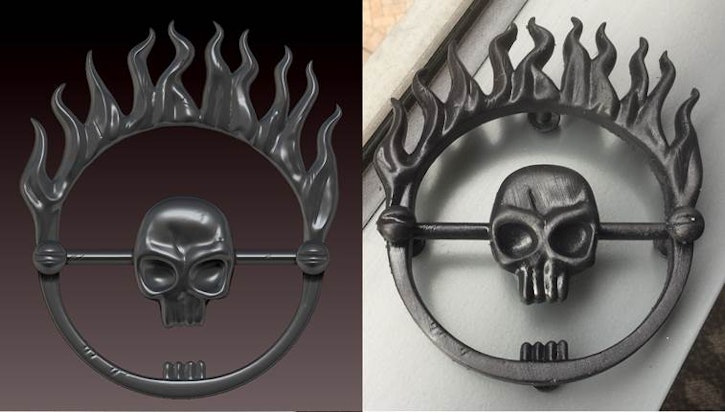
I used the studio Form1 printer to turn my model into a real, plastic prop, which I drybrushed with metallic paint for the final look. The Form1 is a much higher quality printer than your typical desktop model, but you don’t have to spend thousands on a printer just to get one prop. There are services such as shapeways which will print your model for you in a variety of materials.
And the final touch was the haircut, which I shaved for the Cosplay for Cancer fundraiser.
Check out Cosplay for Cancer for more info on the story behind the cosplay and how to donate. The event is due to end on the 14th November 2015.
Thanks to everyone who's donated for far!
Siobhan Doyle
We Love Animation®
Brown Bag Labs is an exciting online space, brought to you by Brown Bag Films. We share great content for families as well as behind the scenes fun and tutorials from the Brown Bag Films team.
Get our great newsletter!
Get our great newsletter!